These directions for building the Mudroom Lockers build upon the directions for building a Mudroom Bench. For more details on how to use certain tools, how to join boards together, and a more complete description of assembly, review the steps in the bench build before attempting the lockers.
———————————————————
Tools:
- Kreg Adaptive Cutting System Plunge-Cut Track Saw
- Router
- Router Table
- Router Bits
- Table Saw
- Brad Nailer
- Orbital Sander
- Mouse Sander
- Pocket hole jig
- Sandpaper
- Drill
- Paint Sprayer
- Paint Brushes
- Caulk Gun
- Paint booth
- Tarps
Materials:
- ¾” Birch Plywood for the frame and shelves (number of sheets will depend on your measurements)
- ¼” Birch Plywood for the backer as well as the doors
- 1” poplar for the doors
- Pocket Hole Screws
- Pocket Hole Plugs
- 1 1/4” stainless steel wood screws
- Wood Filler
- Nails for Brad Nailer
- Edge banding for the plywood edges
- Soft-close Hinges
- Cabinet handles
- Caulk
- Paint or finish of your choice
- Baskets for Shelves
Gather Materials and Determine the Size:
For our setup, we based the size of the lockers on the previously built bench, maintaining the same dimensions for a consistent, visually balanced look. This means the lockers will span 80” across, with each locker measuring just under 20” wide. (check the bench build for all the math). We chose a depth of 12” for the lockers, which is a standard and practical depth for both functionality and appearance. We also decided to have two shelves for each locker – one at the bottom, hidden behind the door, and the other above the door.
The height from the top of the bench to the ceiling is 77 ¼”. I’m installing crown molding at the top of the bench for the built-in look so the lockers will be 74” tall. Here is the math on that one:
The Crown I am using is 0.591 in. x 4.625 in. MDF. Spring angles are 45/45 deg. For a right triangle with a 4-5/8 hypotenuse, each leg computes to 3.27 inches so I am using 3 ¼ for that measurement from the top of the ceiling to the top of the lockers.
Step 1: Break Down Plywood for Bench
To begin, break down your plywood into the necessary parts for all lockers. For our setup, we’ll need a total of 5 dividers (two ends and three in the middle) along with 8 shelves and the backs for the shelves.
Measurements:
-Dividers (5): Two end dividers and three middle dividers that will go between the lockers in the center. Each divider will measure 74” x 12”.
– Shelves (8): One inside each locker plus the one above. These will measure 12” x 19 1/8”.
– Back Panels (4) & (4): The back panel for the bottom shelves will be 8” x 19 1/8”, while the back panel for the top shelves will be 11” x 19 1/8”. You’ll need four of each (these may be different measurements based on where you place your shelves).

Step 2: Assemble One Locker
Begin by assembling the first locker. Lay out the two dividers and attach them to the bottom shelf using pocket holes and screws for a secure joint. Once the base is secured, add the back panels. Based on your cuts, the size of the panels should put your shelves at the exact distance from the top or bottom that you planned on (in my case 8” from the bottom and 11” from the top)
I use mostly pocket holes when attaching everything. Watch this video for a quick recap on how to make pocket holes.
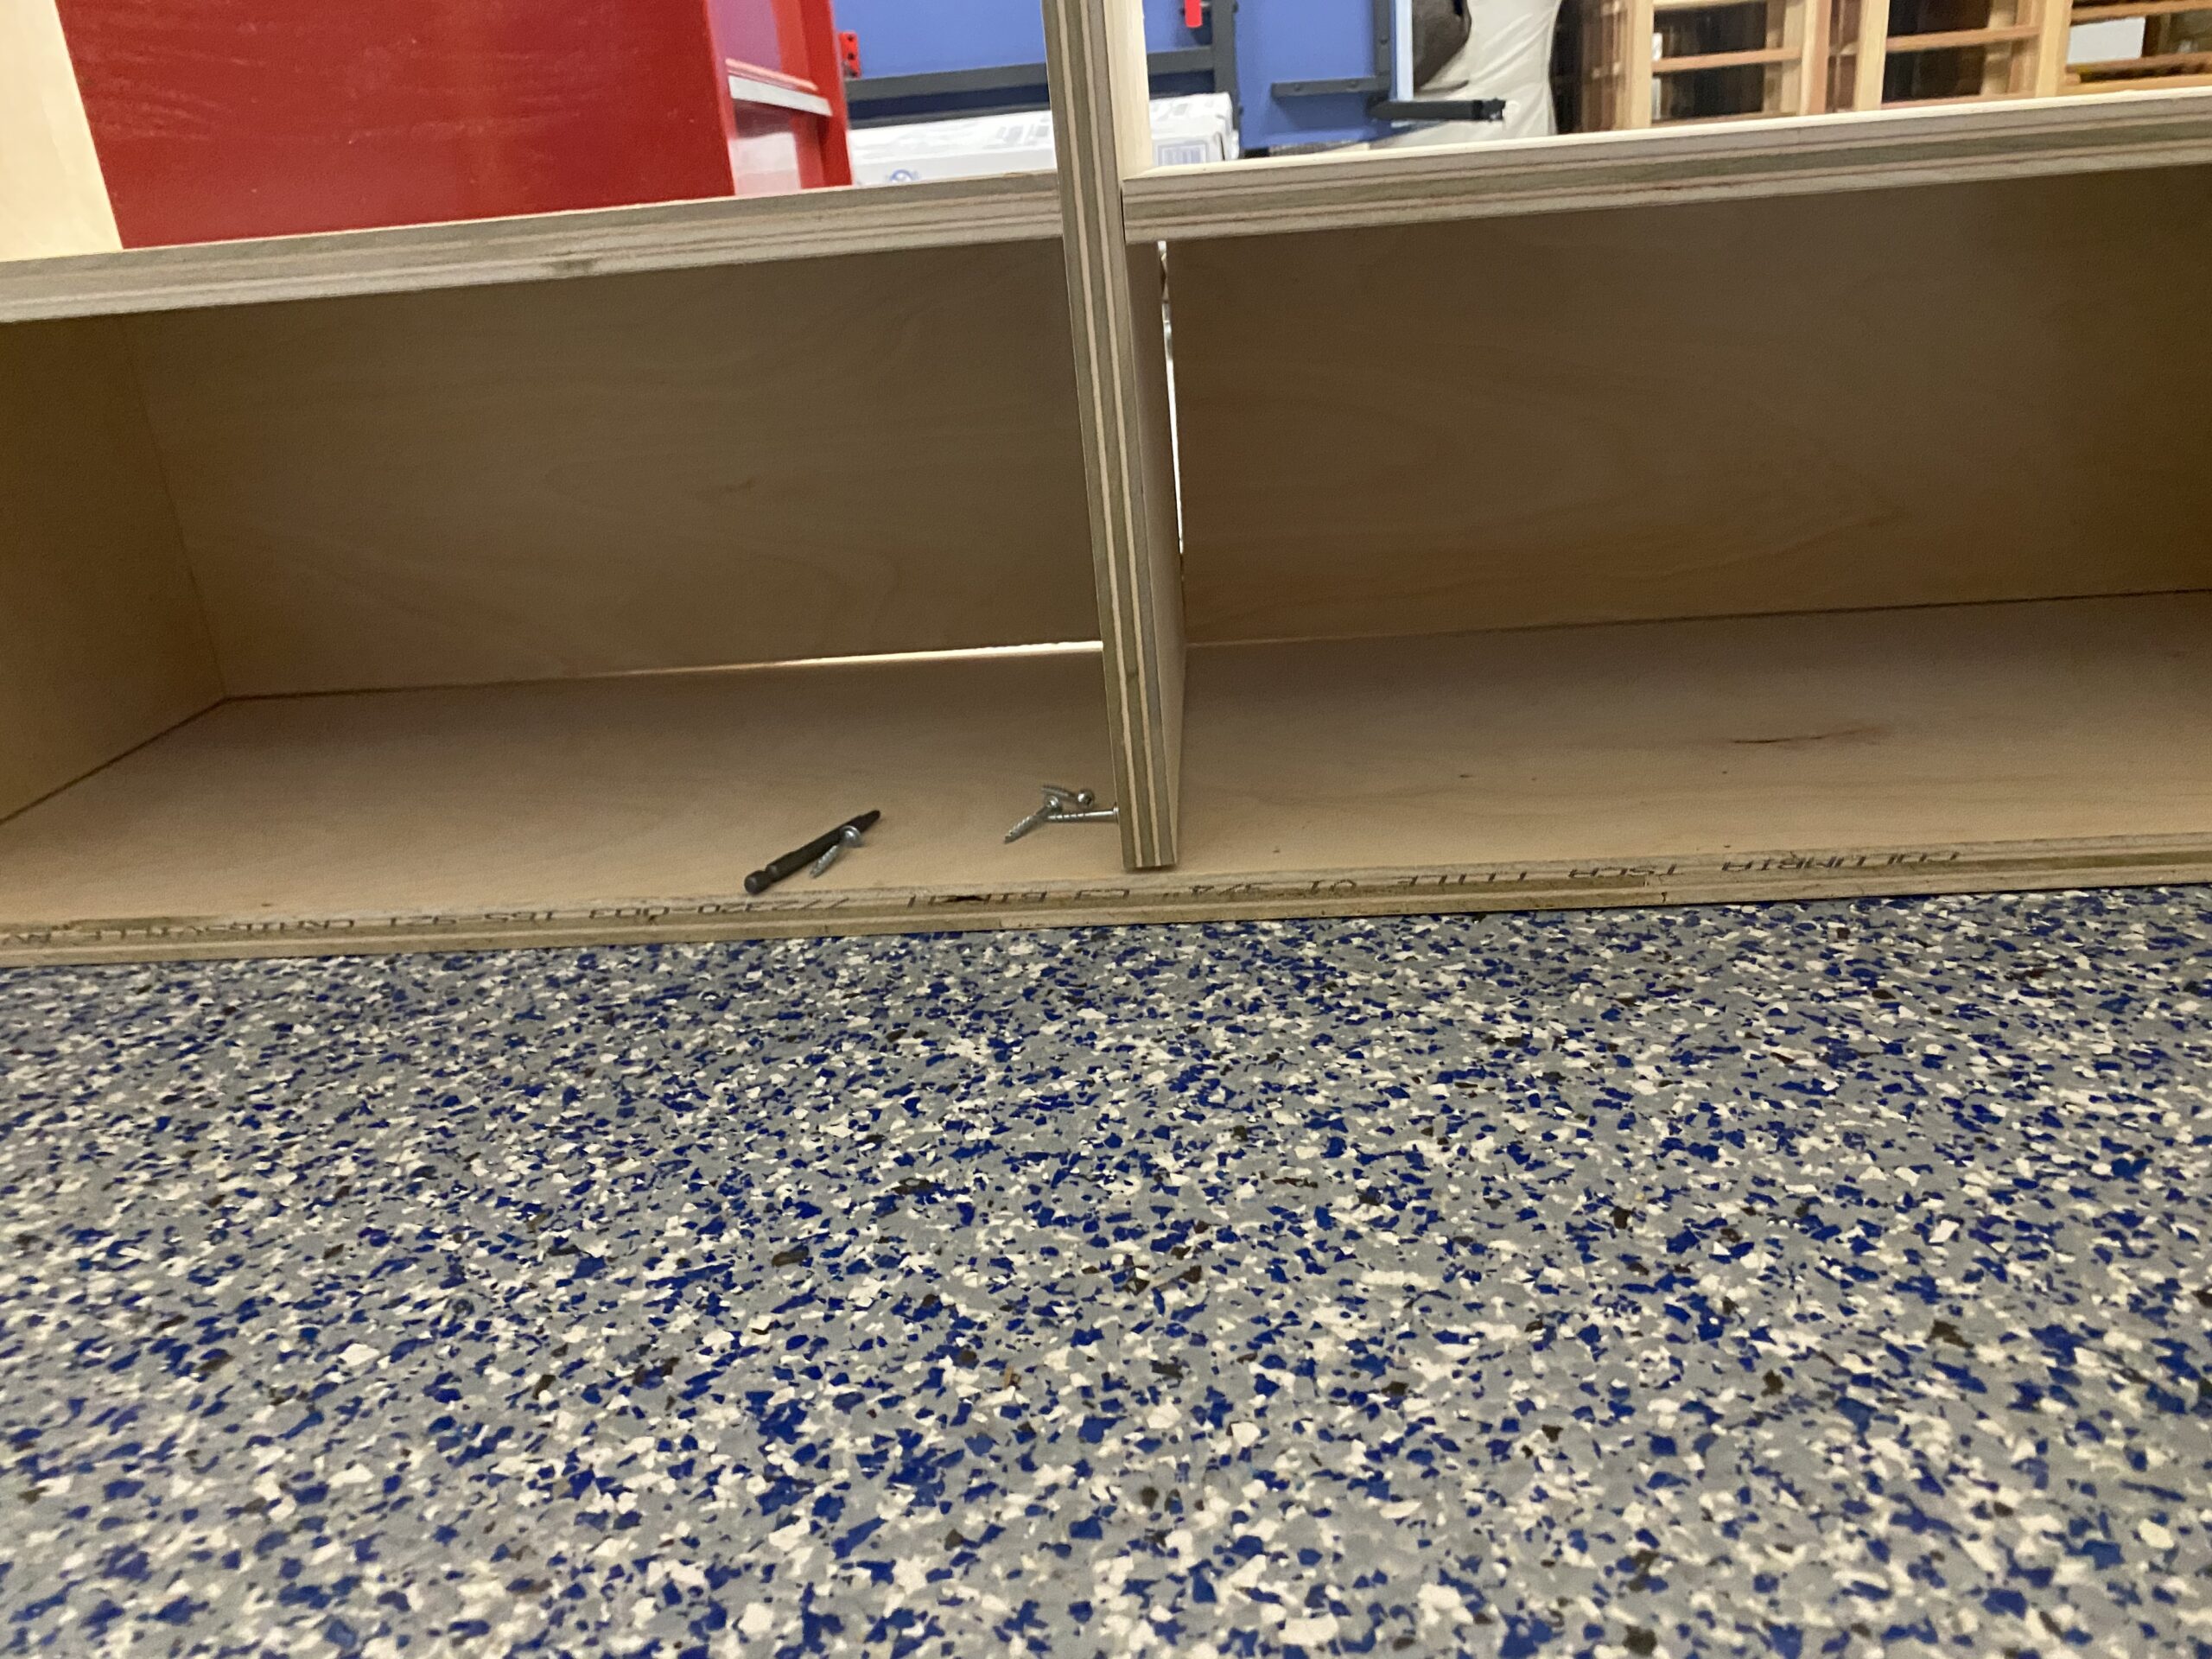
Tip: When assembling, check that the edges are square and aligned to ensure stability and even spacing between each piece. This is key to ensuring your lockers are uniform and will look polished.
If you don’t, you might end up with a problem like this:
Step 3: Add Additional Lockers
After assembling one locker, repeat the process for the remaining three by using the assembled locker(s) to build upon. Attach the dividers, shelves, and back panels to each locker, ensuring uniformity. Repeat this step until you have all four lockers assembled.
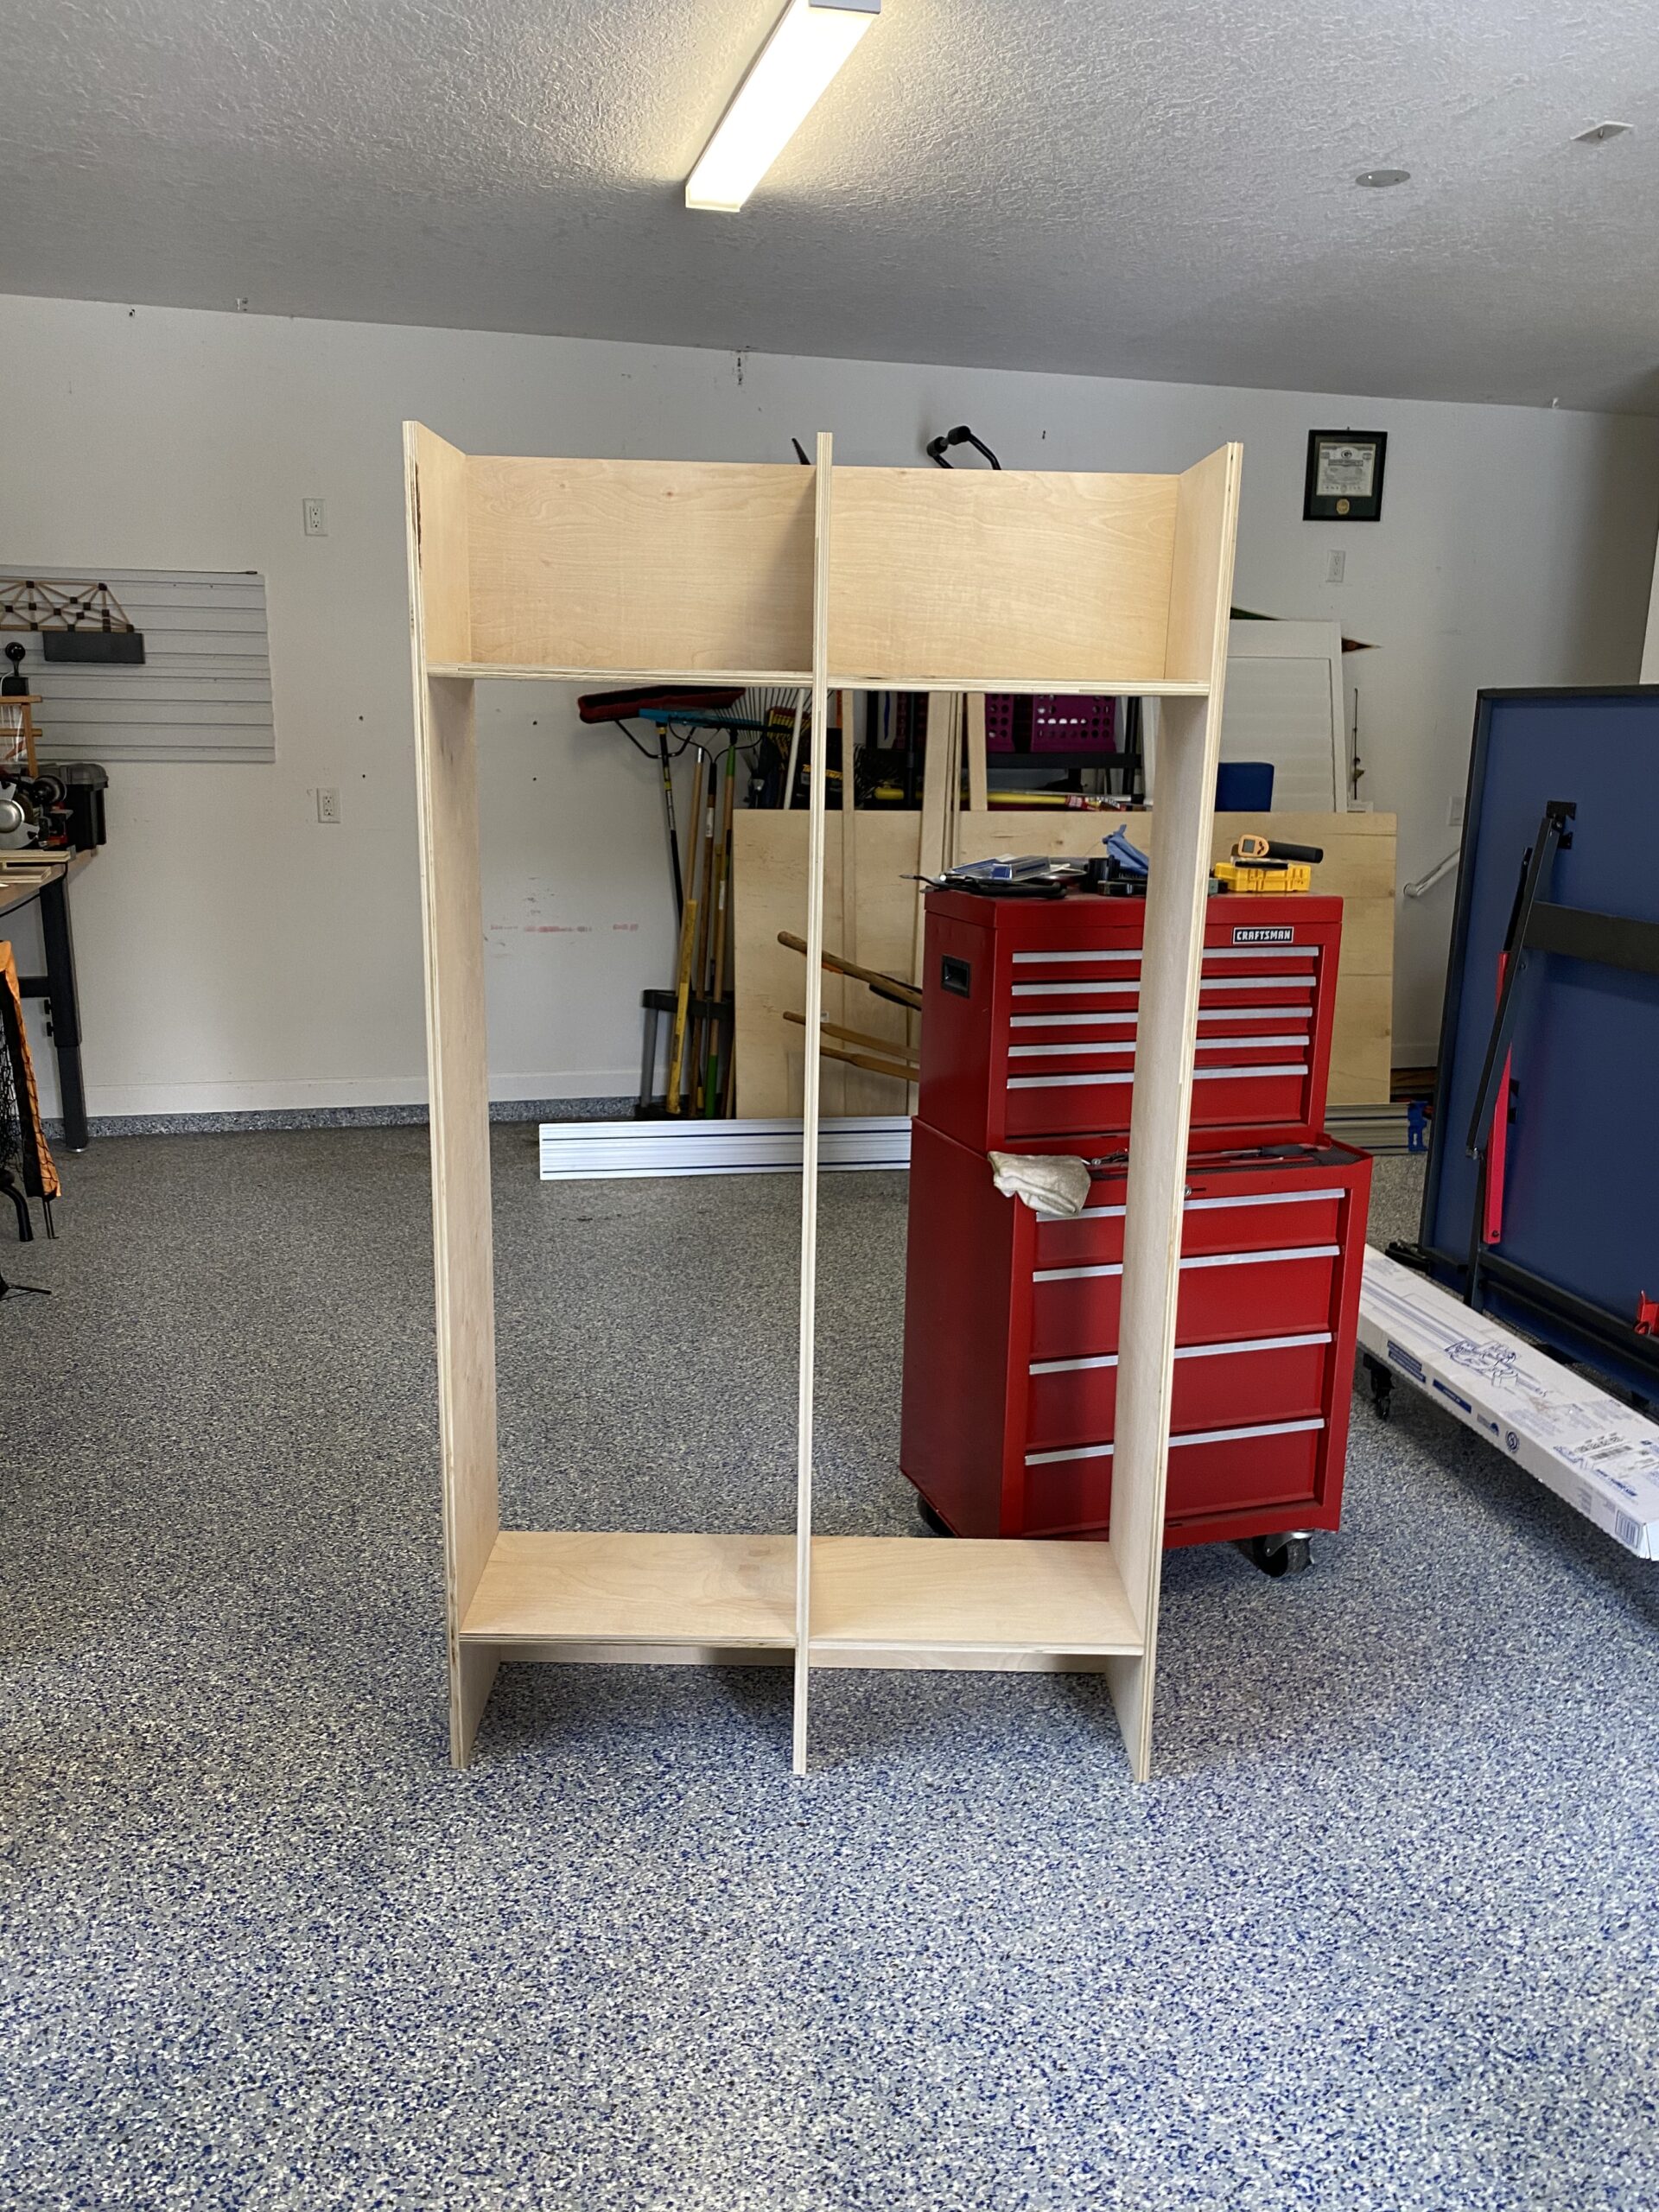
The assembly is going to start getting heavy very quickly so work in an area where you can leave the full locker assembly in place during the finishing work. Or, put it on dollies (this is what I did!)

Step 4: Attach the ¼” Plywood to the Back
Now, you’ll need to attach the back panel to the entire row of lockers. Since the lockers are 80” wide, a single sheet of ¼” plywood won’t suffice. You’ll need to join two 4×8-foot sheets along the center divider. Cut them to size based on where you put your shelves. Attach them horizontally across the back, ensuring they are flush against the dividers and secure with a brad nailer.
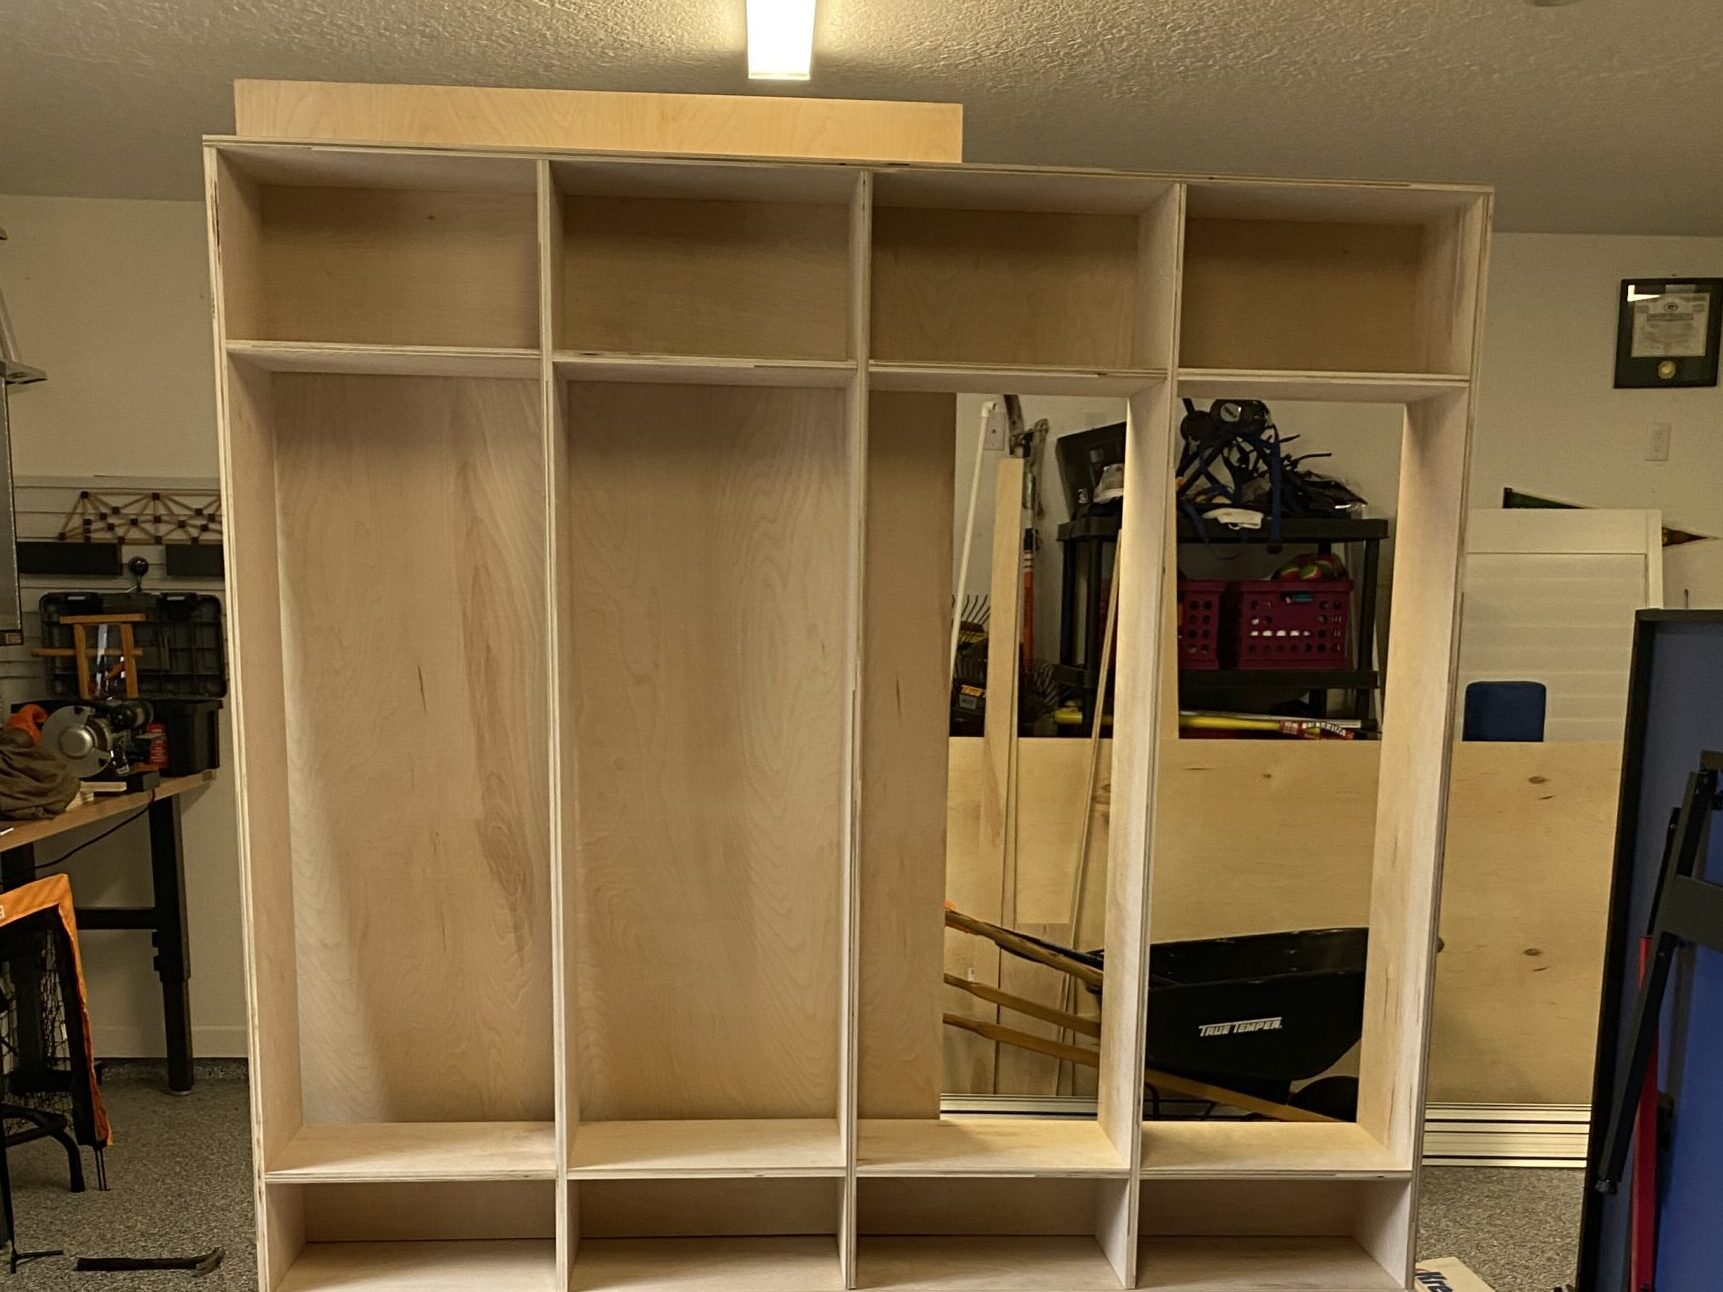

Tip: Be mindful of any seams in the back panel and make sure they are as smooth as possible to avoid unevenness in the final look.
Step 5: Apply Edge Banding
Once all the major pieces are assembled, it’s time to finish the plywood edges. The plywood edges will be exposed, so it’s important to cover them to give the lockers a more polished, seamless look. Use iron-on edge banding to cover all exposed edges.
Tip: When using iron-on edge banding, you’ll want to carefully align the banding to the plywood edge and press it with a hot iron. Once it’s cooled, trim the excess with a utility knife and sand it down for a smooth finish.
Alternative: If you prefer, you can fill the edges with wood filler, sand it smooth, and paint over it for a smooth surface.
Step 6: Add Special Designs
If you want to add a custom design or extra details, now is likely the best time to do so. For example, I needed to match the Shaker-style look we added to the bench, so I shaved down a poplar board to approximately ¼” thick and framed the exposed side of the lockers. This adds a nice decorative touch that ties in with the bench design where I did the same thing (see Step 9 on the bench build for more details on this).

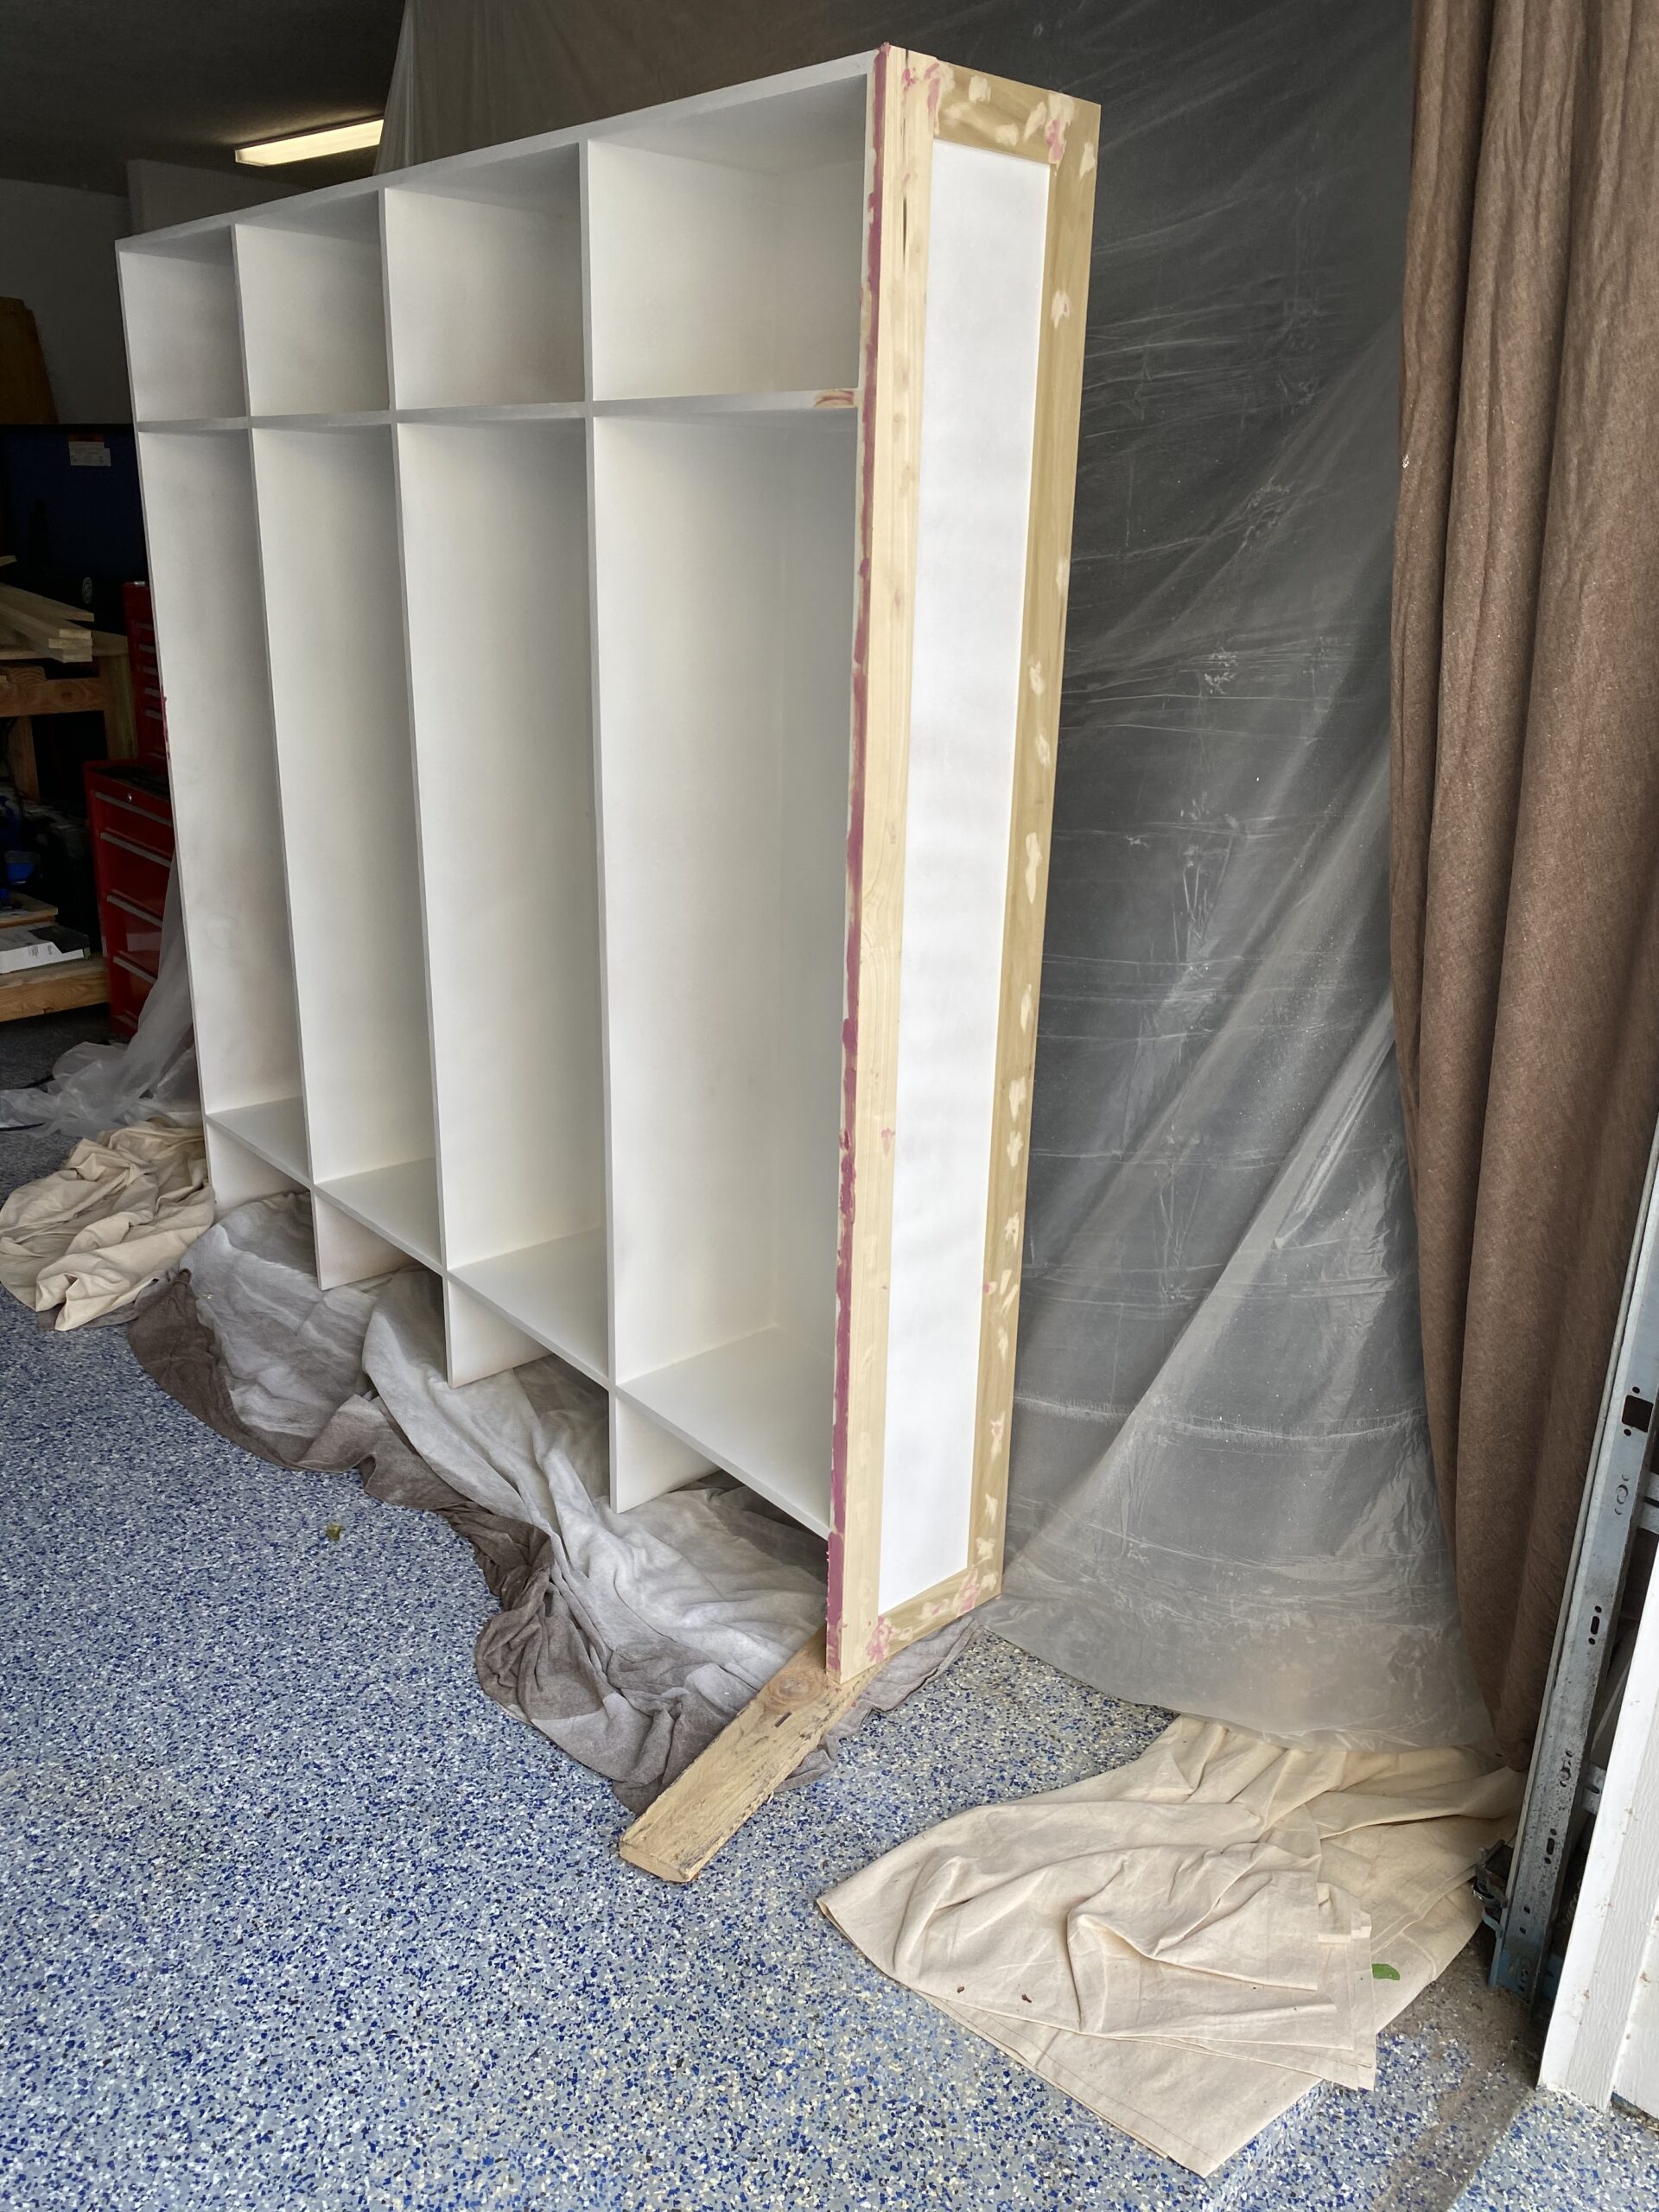
Tip: You can customize the design further by adding molding along the edges or faux paneling for a more high-end look.
Step 7: Paint the Mudroom Locker Setup
Before you begin painting, make sure everything has been sanded and all surfaces are smooth and clean.
For a professional finish, I recommend using a paint sprayer. It provides an even coat and a smooth finish compared to brush painting. I like to use a cheaper air compressor-powered paint sprayer as it has always done a great job for me.

If you don’t own an air compressor, you can invest in an electric paint sprayer. However, an air compressor is versatile and useful for other projects as well.
We used Behr Urethane Alkyd Satin Enamel for our paint, which gives the look of oil-based paint but is water-based for easier cleanup. Choose a paint that fits your style, and remember to paint in a well-ventilated area. Using a drop cloth and a painting tent can help keep the area clean and prevent overspray.
Step 8: Optional Doors
If you choose to add doors, you’ll need to build frames using 1” poplar boards and ¼” plywood for the panels. I built the doors using the same method I used for the bench drawer faces. They did turn out a bit on the lighter side and if I had to do it again I would have gone with a heavier wood, but they are great for the kids to open and close without an issue.
The measurements here can be a little tricky. The doors should all be uniform in height but their widths are likely not going to be the same. My suggestion is to lay them out before doing any kind of final assembly to make sure you have the measurements right. For my particular build, the height of all the doors was the same at 61 5/8” – this leaves a slight gap at the bottom so the doors don’t rub on the bench top. For the width, I had one door that was 20 ½” wide, one that was 20” wide, and two that were about 19 ½” wide. The reason being – the 20 ½” is on the far right side and is flush with the end of the lockers. That is the same side that I added the trimmed-down poplar board to match the shaker look, so I needed the door to be wider to cover that additional material. The door on the right up against the wall was 20” because that one does not have an overlap door to worry about and can be closer to the edge of the wall (within reason). Note this is the door that will also use full overlay hinges!
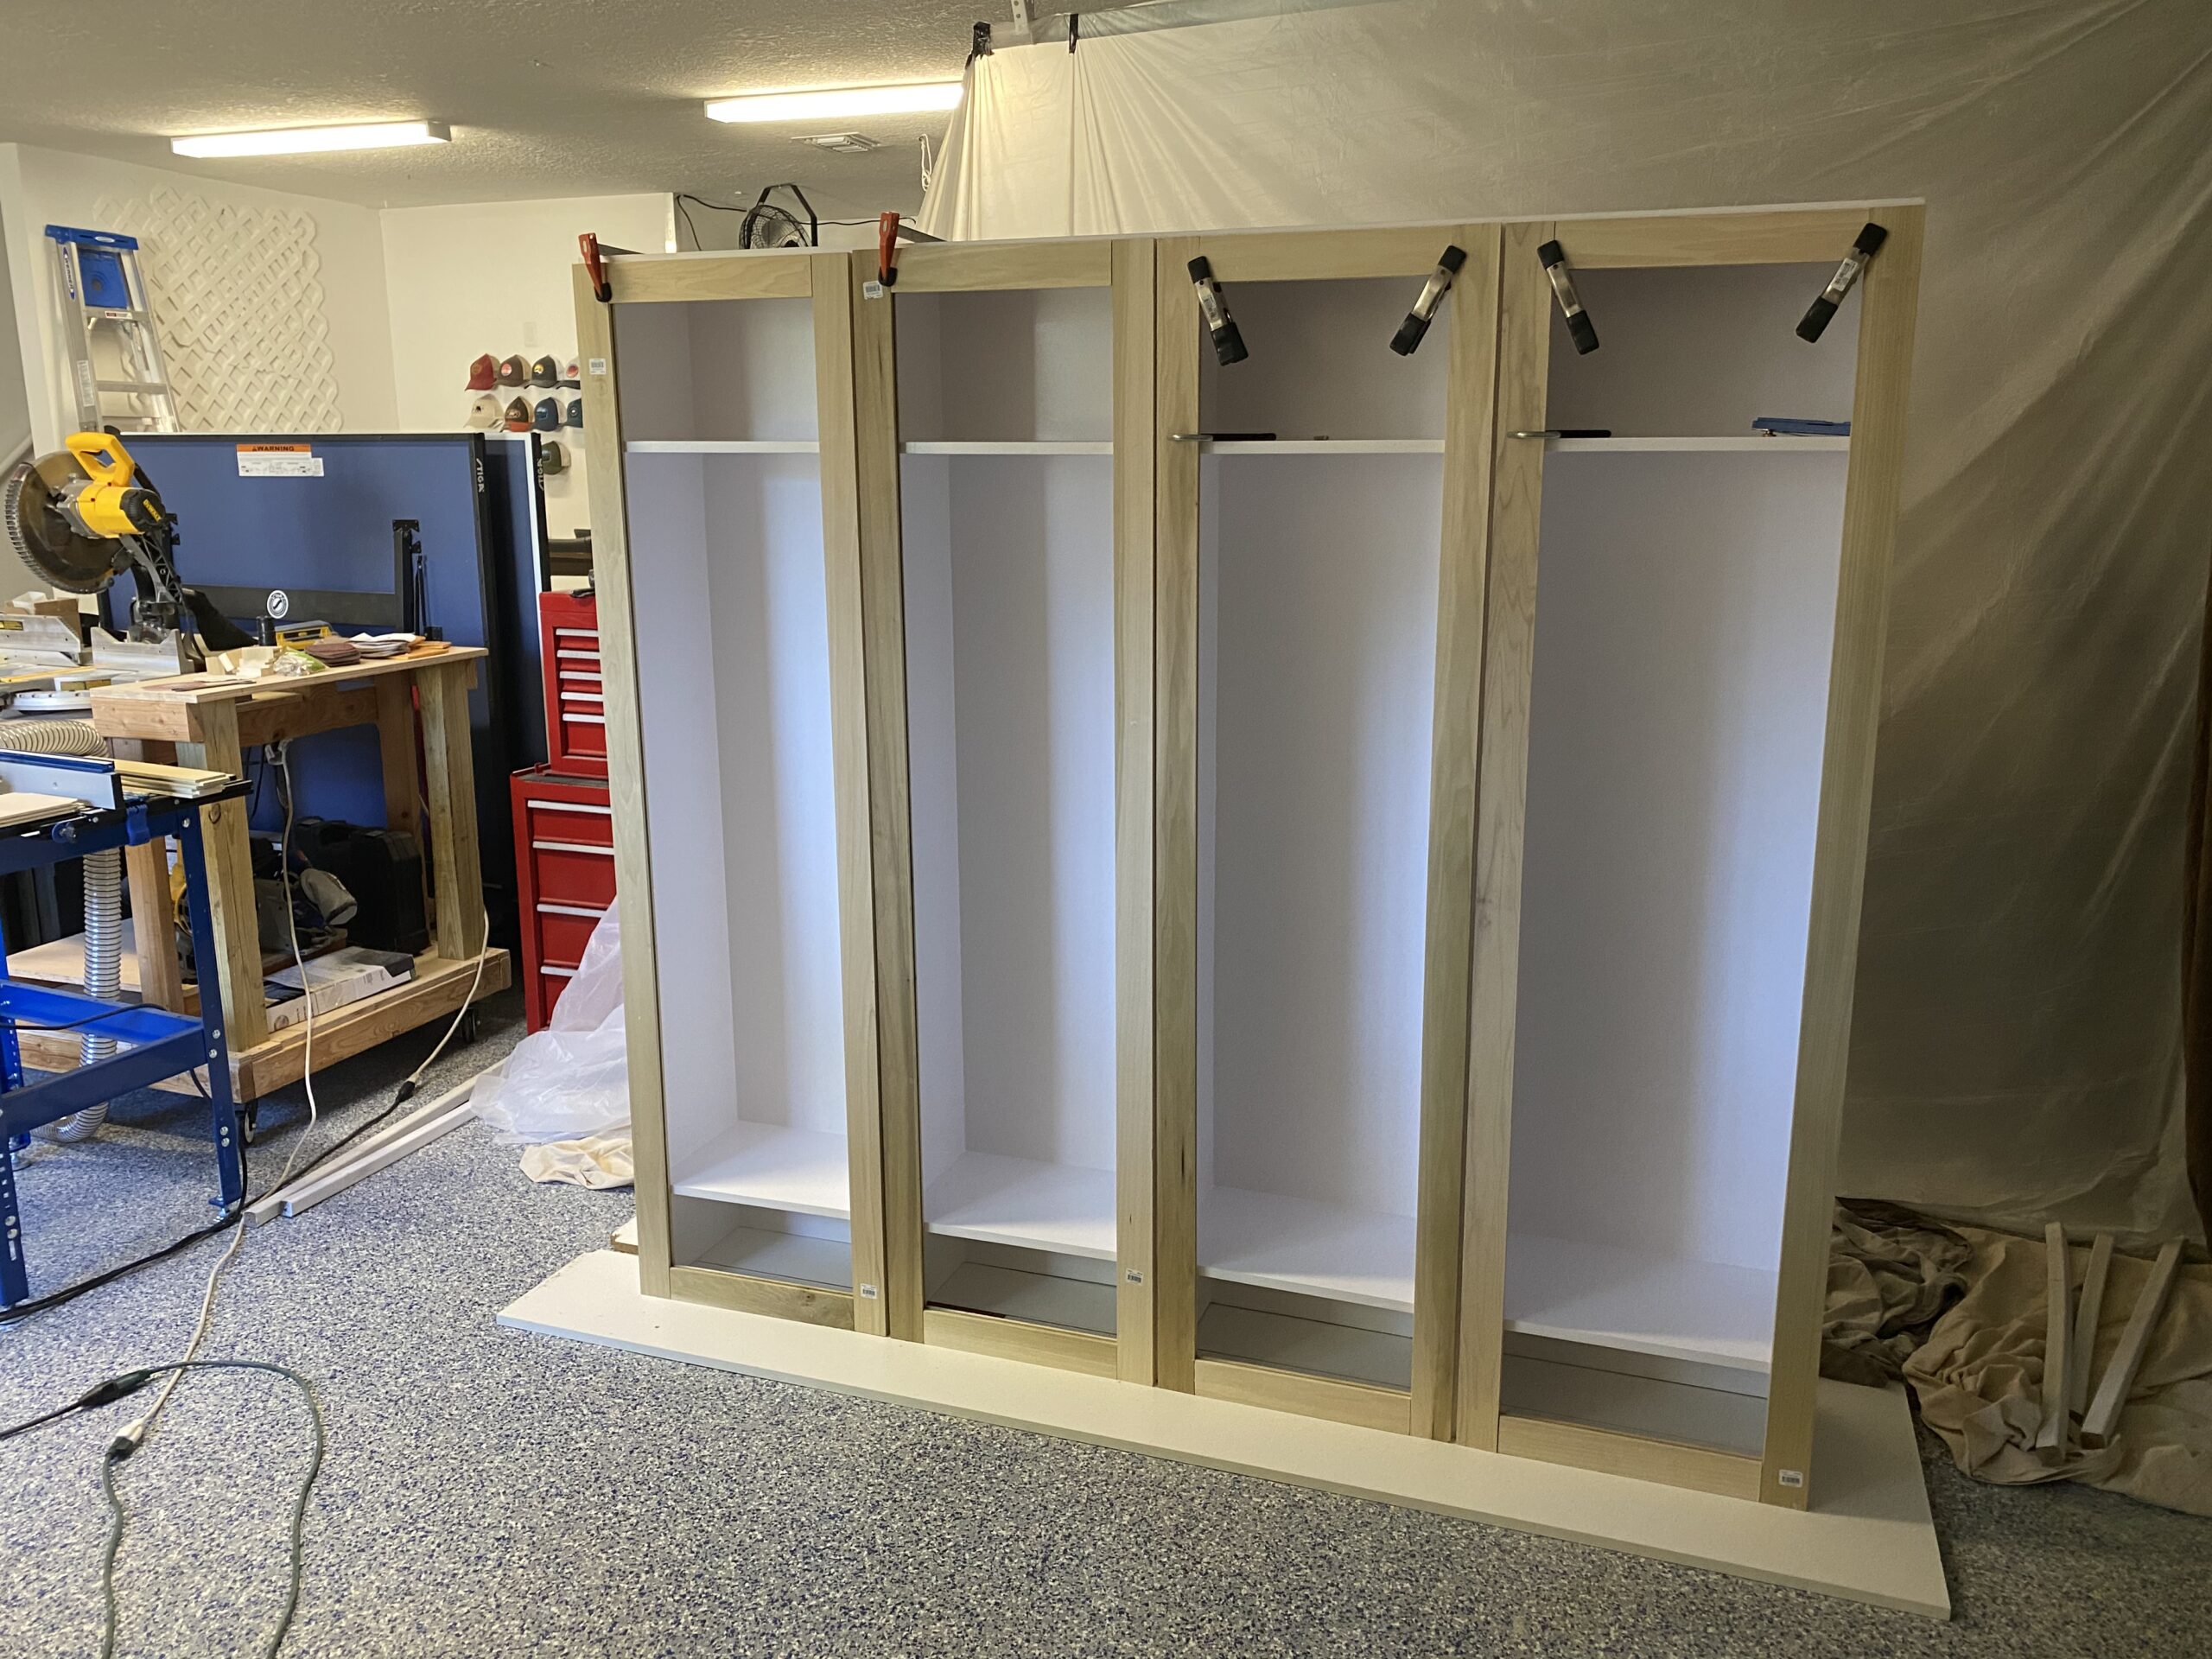
I made the doors to match the Shaker style bench drawers. The Shaker style is a cope-and-stick construction that has recessed panel doors. This means the horizontal rails fit between the vertical stiles to form the frame with 90-degree angles. The “stiles” are the vertical boards and the “rails” are the horizontal boards..
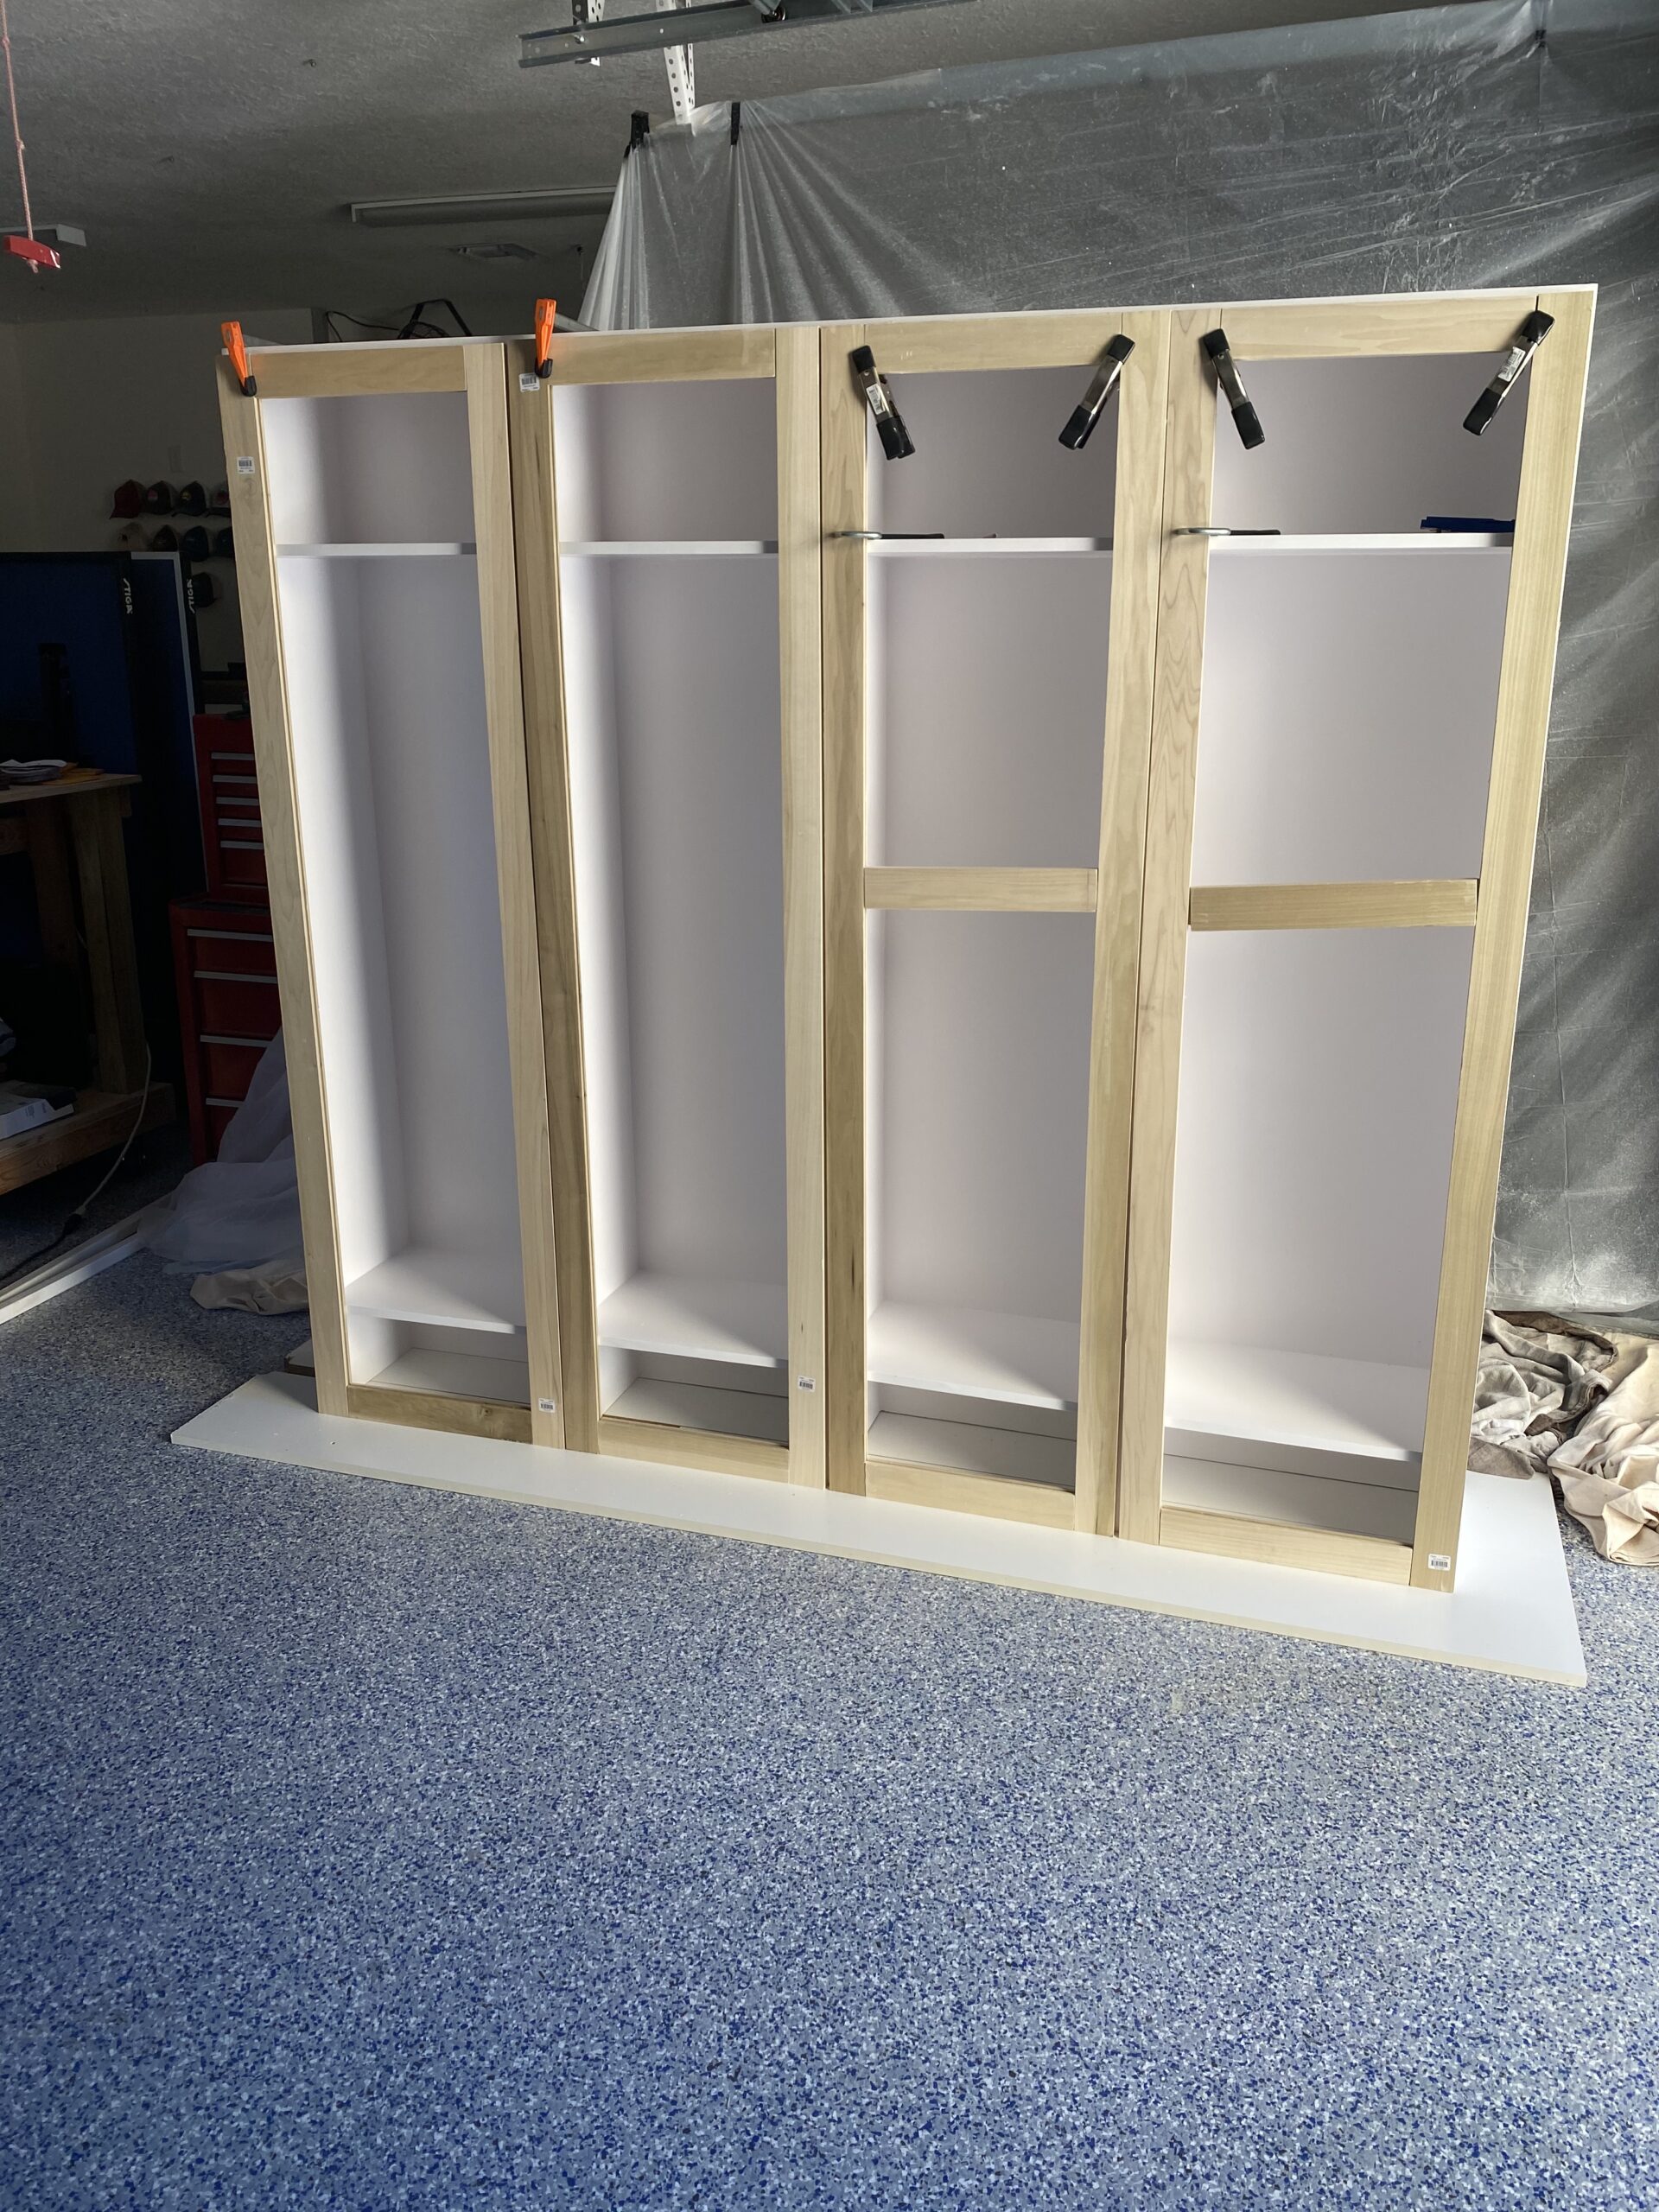
Because we are using ¼” plywood as the main part of the face, we need to put that size groove in the 1” poplar. The standard practice is to put the wood in the middle of the frame, but you should choose how you want to do it. For standard measurements, we will assume 3/4” actual board gives us ¼” on either side of the ¼” groove.
Note: from our earlier point, nominal vs. actual measurements on wood is different. We noted above that ¼” plywood is actually 7/32” thick.
Once the frames are assembled, attach the ¼” plywood to the frames, ensuring the panels fit snugly within the grooves.

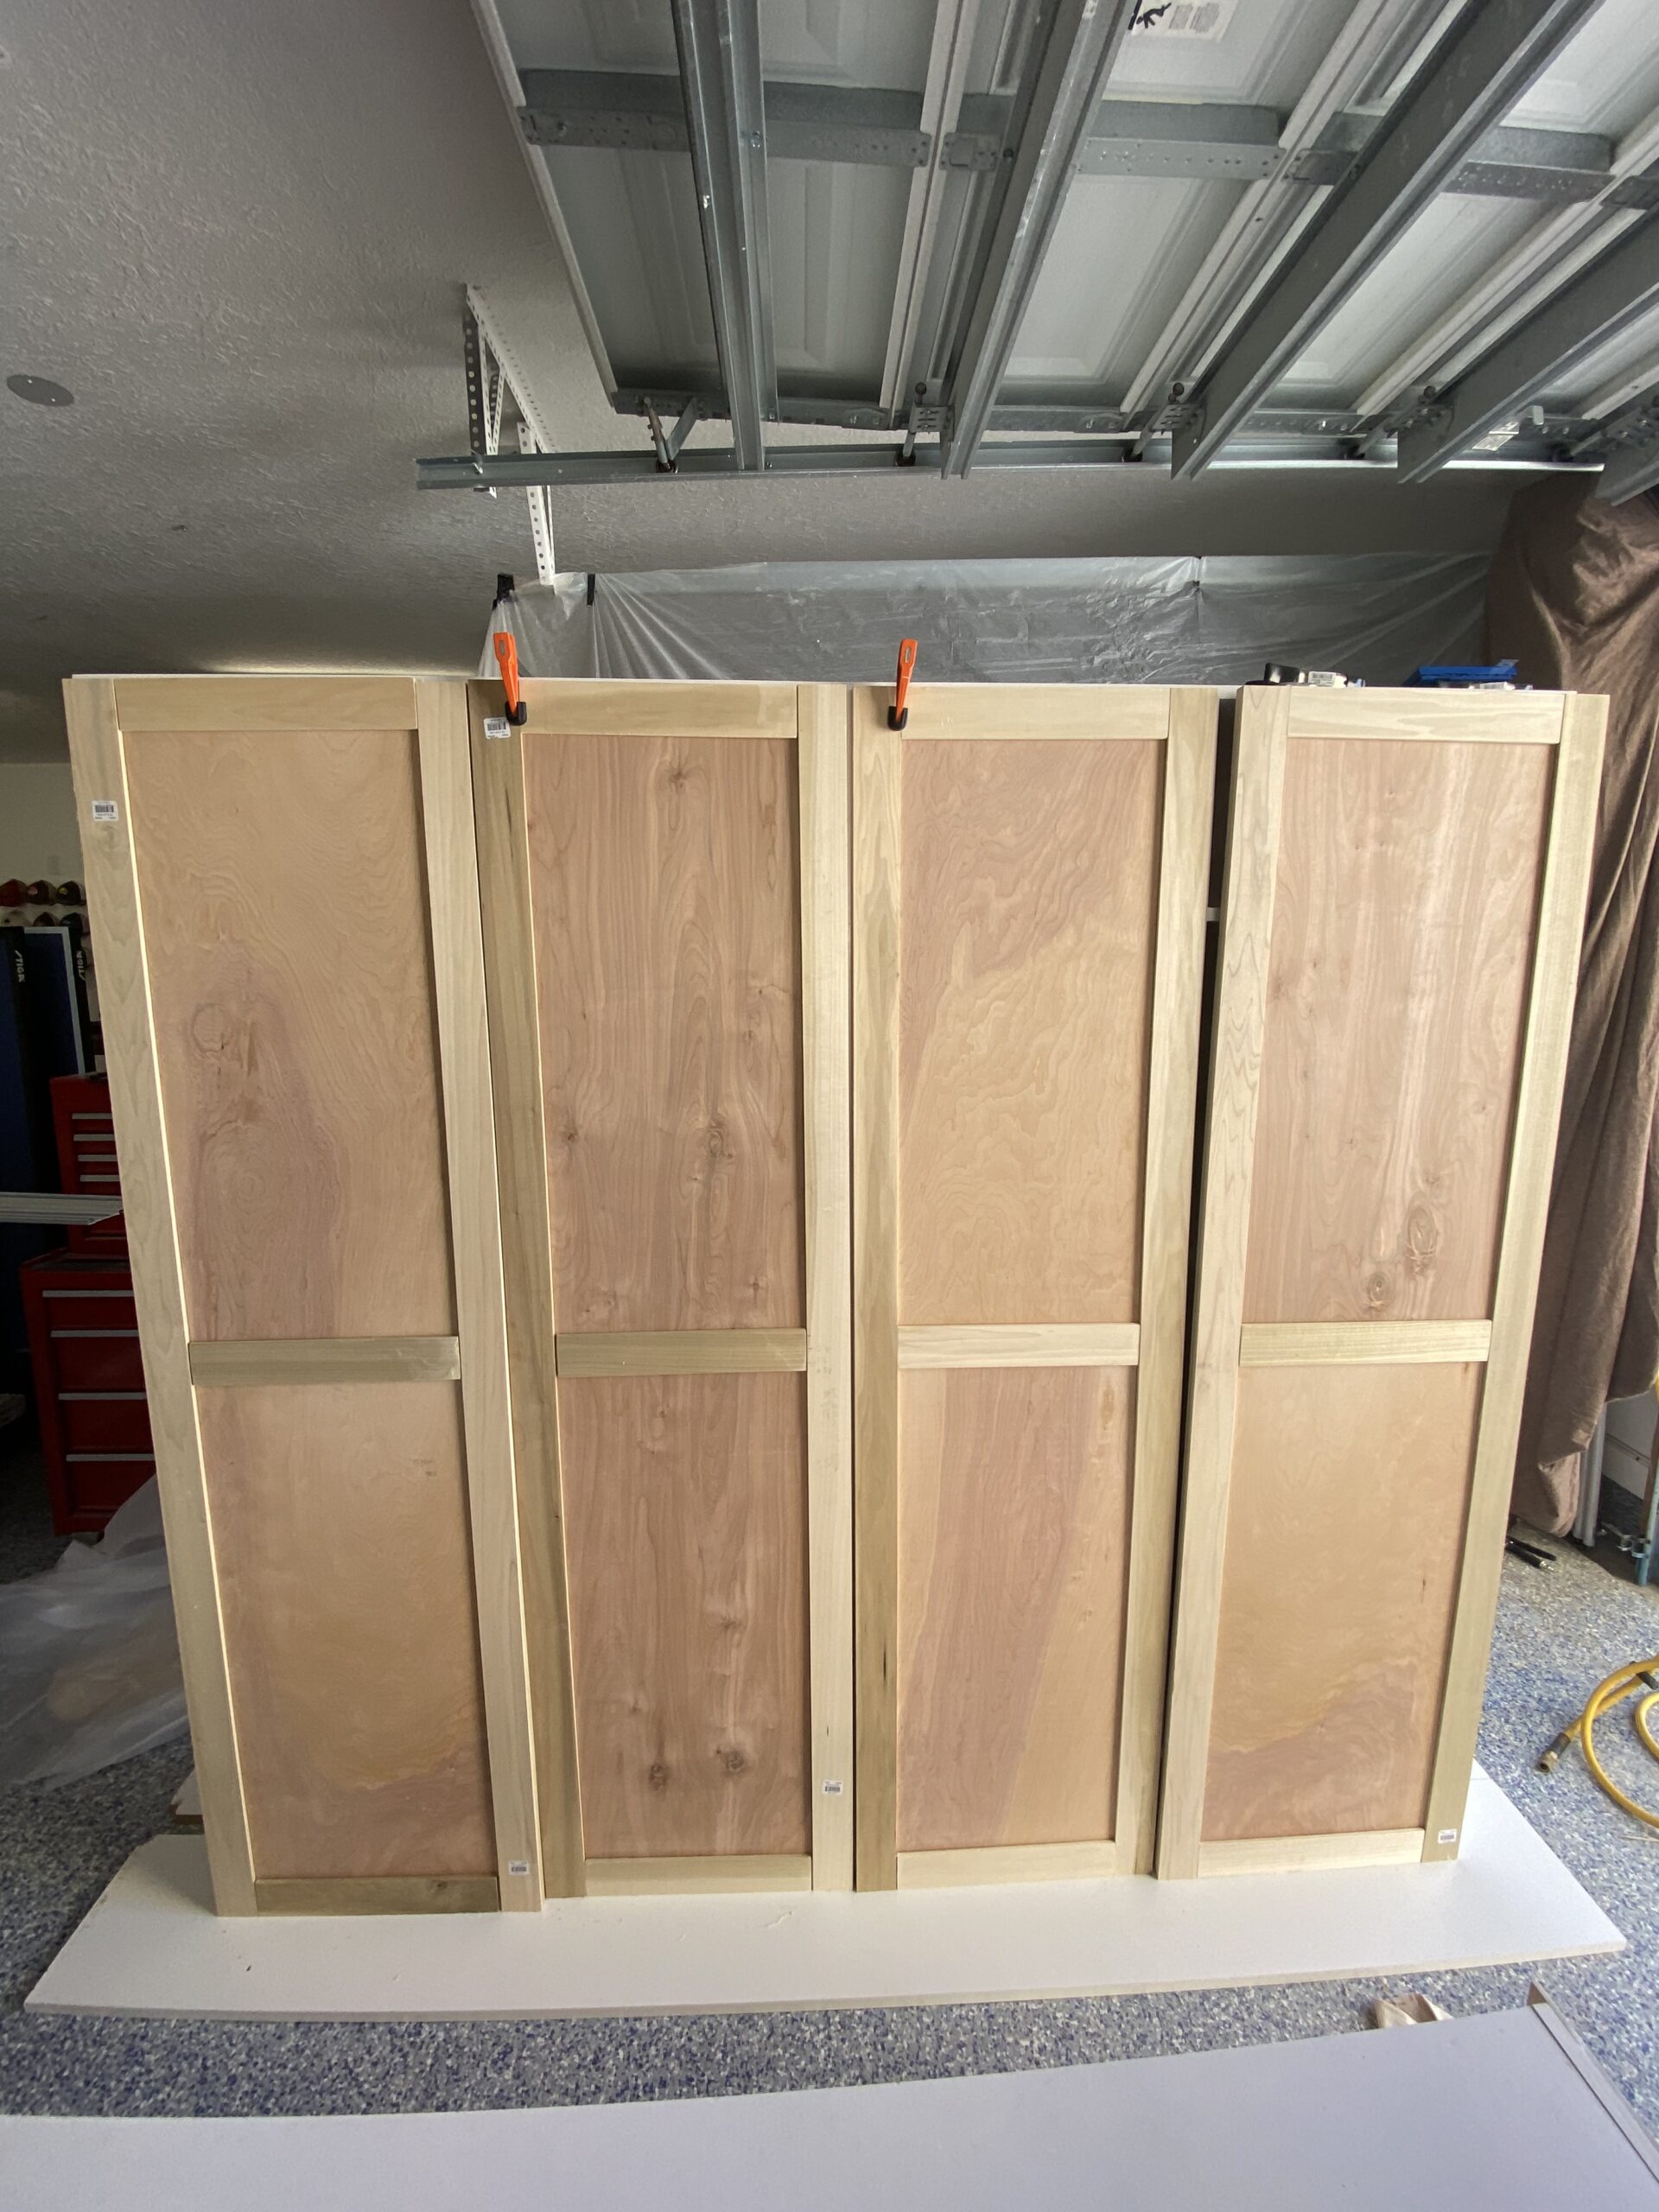
Tip: Use a router with rail and stile bits to create grooves for the panels. This ensures a professional, flush fit for the plywood panel.
When the doors are fully assembled, you can paint them the same way you painted the lockers.
Step 9: Secure the Lockers and Add Crown Molding
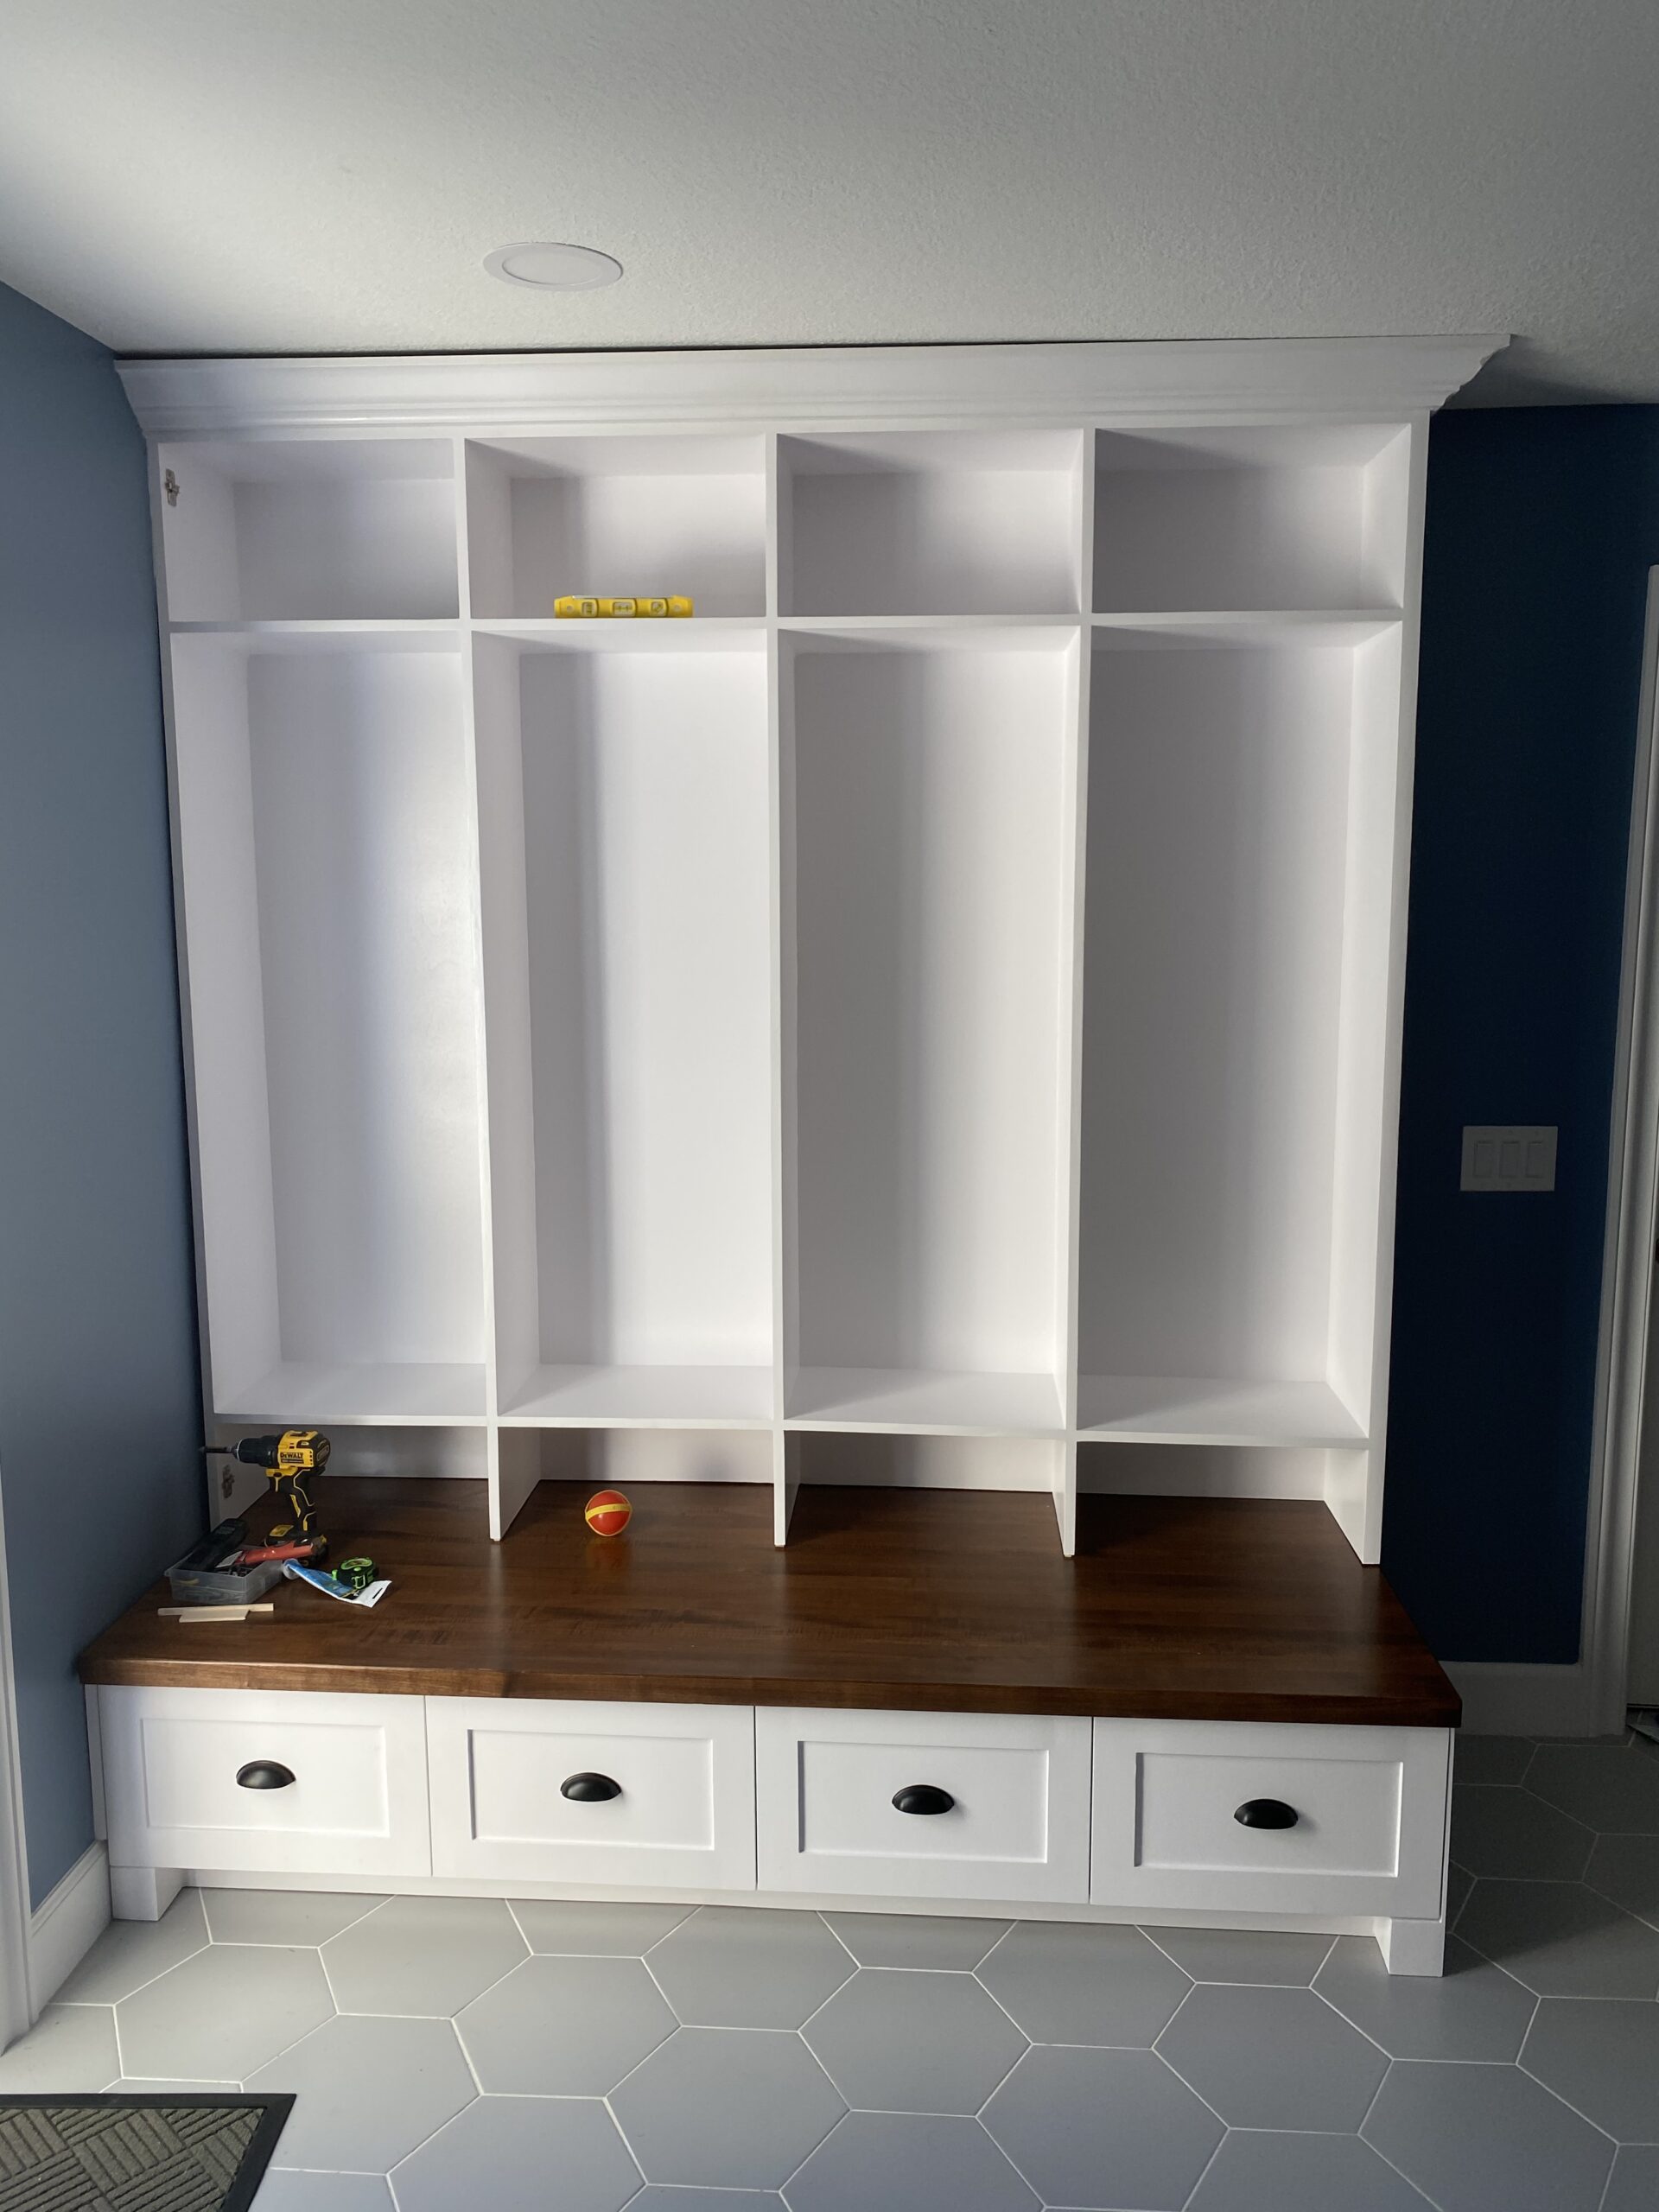
Once the lockers are painted and dried, move them into place with the help of a family member – or three. The assembly will be heavy enough that you don’t have to do much attaching, but you may want to place a couple of brackets on the top of the assembly to connect it to the back of the wall for peace of mind. The brackets will be hidden by the crown molding, so there are no worries about aesthetics. To finish off the top, install crown molding around the edges. Measure the length needed and cut the crown at a 45-degree angle where the sides meet. It’s best to add a piece of scrap wood to the top of the lockers as well as a full strip on the face of the scrap to attach the crown to.
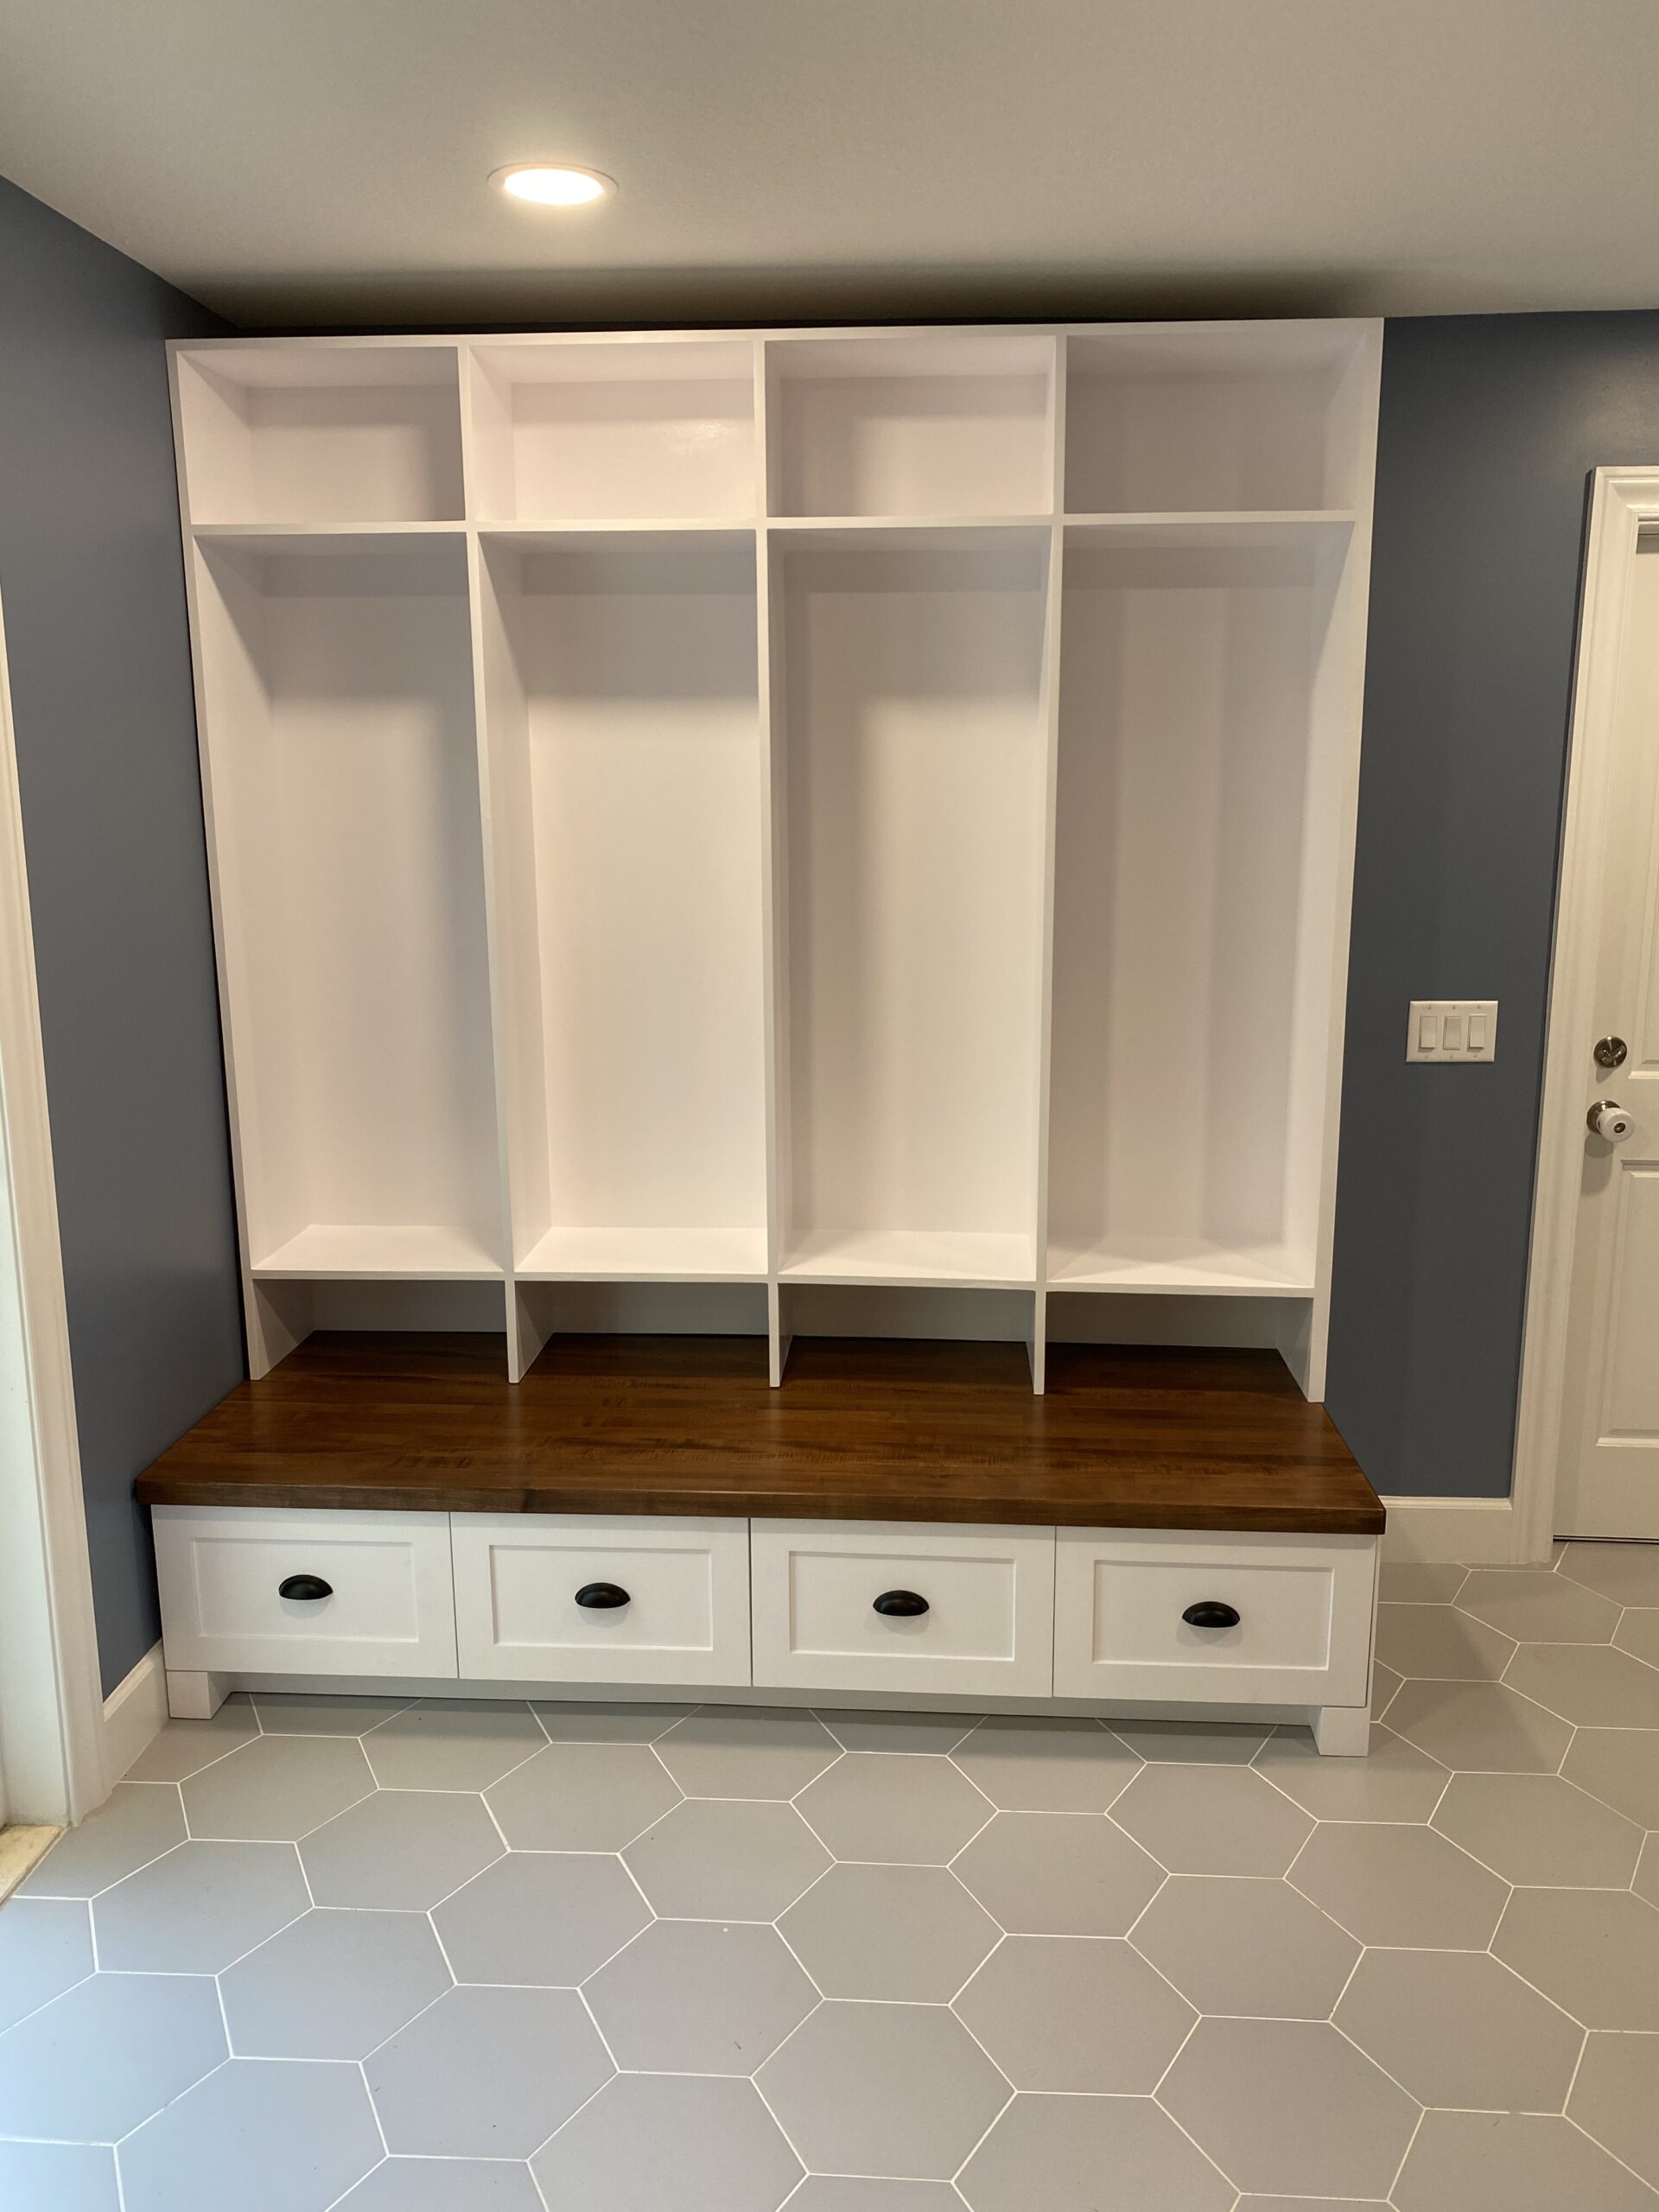
If there is a small gap between the molding and the wall or between the lockers and the bench, fill it in with caulk for a seamless look. I had the unfortunate problem of an uneven floor and/or ceiling, so I had a large gap between the crown and the ceiling on one side. But after filling it in with caulk, you can’t tell at all.
Step 10: Attach the Doors
Finally, install the doors by screwing in the hinges. I prefer soft-close doors, especially with my kids slamming them shut, so I purchased the bloom motion hinges with the soft close.
Hinges can get a little tricky installing as you will need to determine if you need full overlay or partial overlay…and in some cases, you may need both! I have you covered, though. Watch this video to determine exactly what you need.
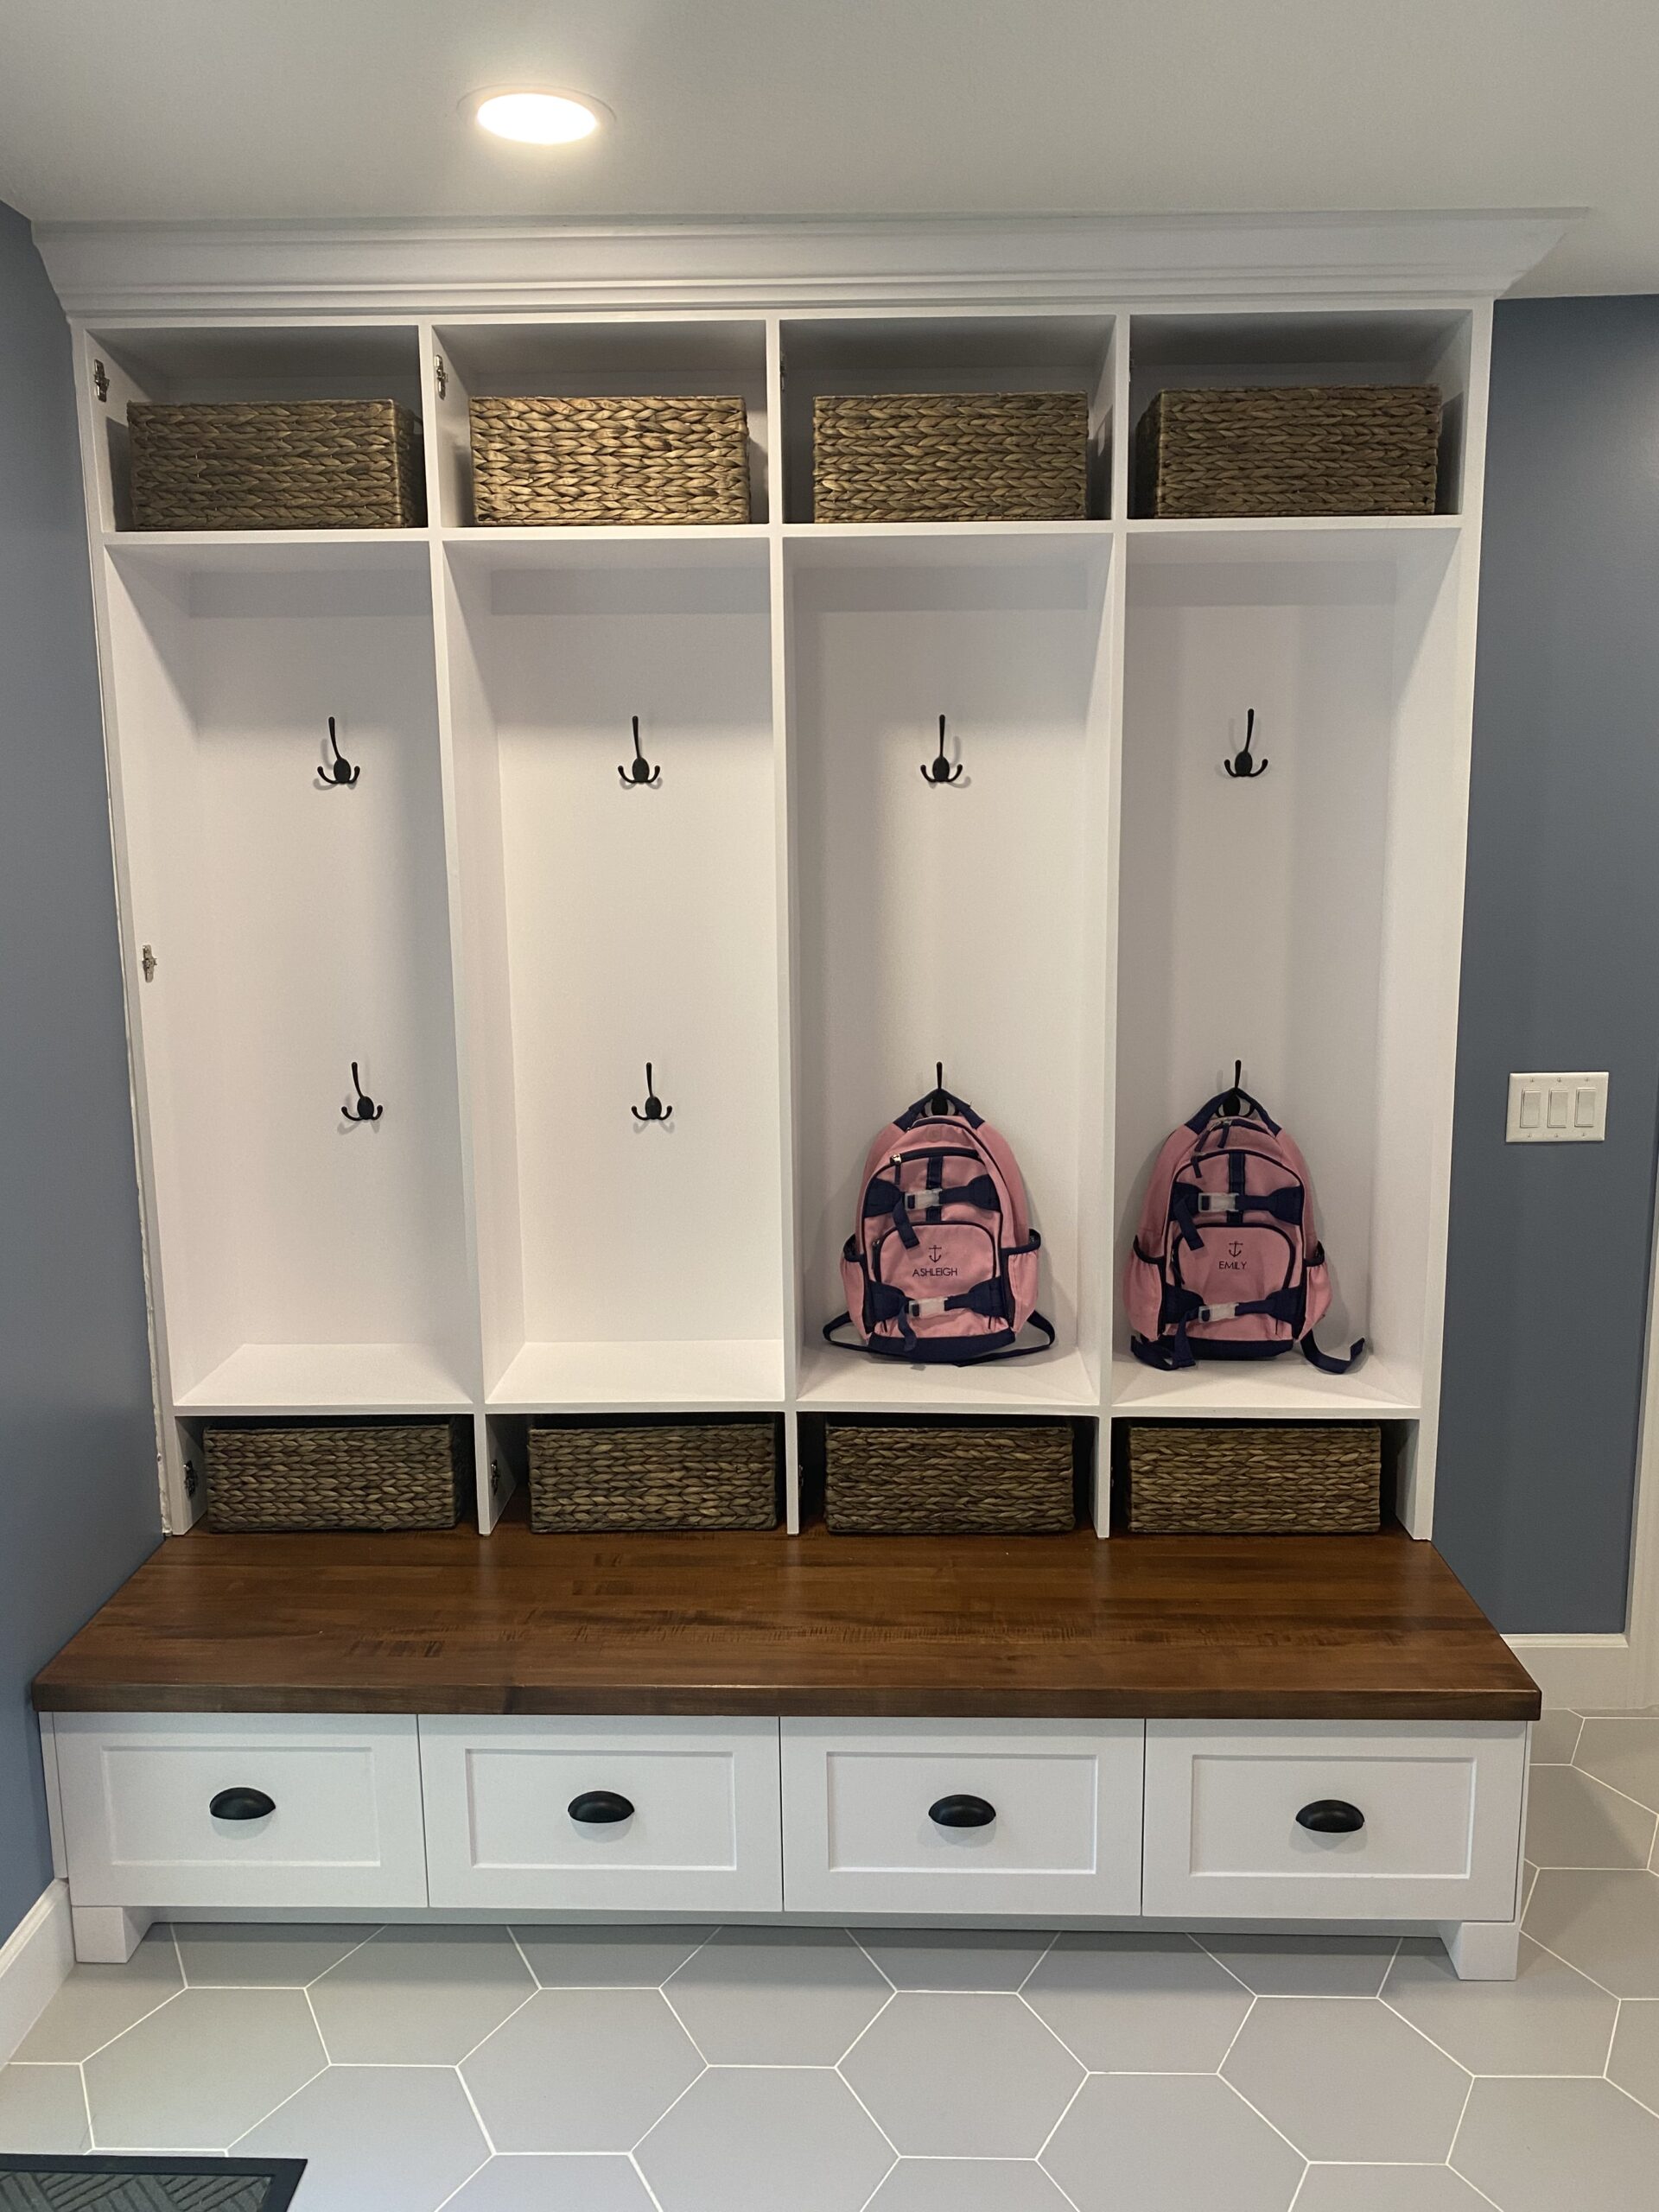
Make sure the hinges are mounted securely and adjust them to ensure the doors open and close smoothly.
This project took a lot of work, but in the end, it was so worth it. We love both the look and the functionality and are constantly getting great comments on it!


 I’m Jeremy, your average spreadsheet king & handy family man. I’m passionate about all things DIY and tools! Here you will find resources for those who love getting their hands dirty and creating something amazing from scratch. Whether you’re a seasoned DIYer or just starting out, there is something for everyone here. I cover a wide range of projects, from building cabinets to fixing up your home. I also provide in-depth reviews on the latest tools on the market and offer helpful tips and tricks to make you a better DIYer. If you’re looking for inspiration, advice, or just some good old-fashion DIY fun, you’ve come to the right place. Subscribe to my channel today and join the community of DIY enthusiasts!